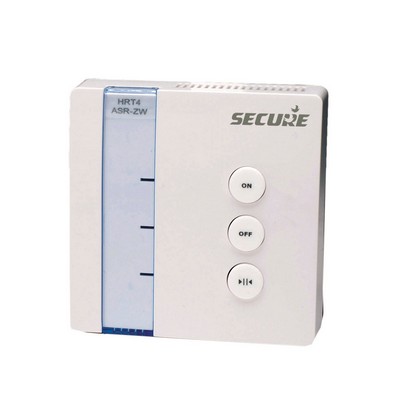
Configuration of SRT321 thermostat and the SSR 303 FIBARO relay
Adding the SRT321 thermostat into the Fibaro system
- Set the control unit into the mode for addding devices Devices –> Add or Remove device -> Add.
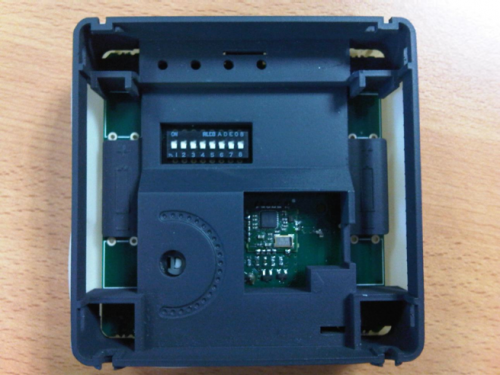
- On the SRT 321 device turn switch 1 into the position ON.
- Turn the wheel until the display shows L. Push the wheel. Then the display shows LP.
- On the SRT 321 device turn switch 1 into the position OFF.
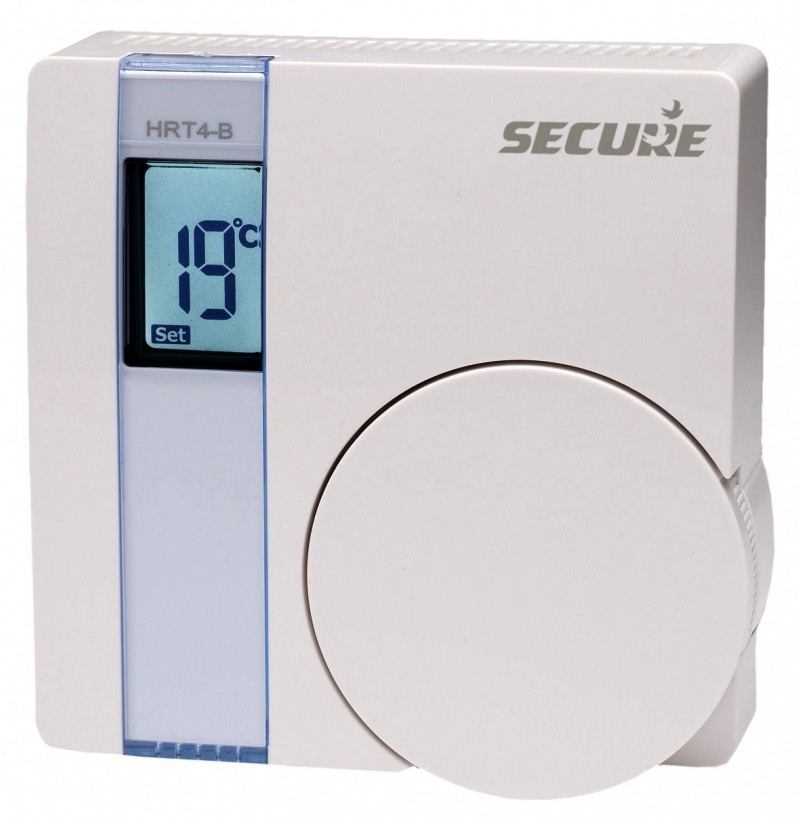
- On the thermostat display you should see the set tepmerature and after pushing the wheel the room tepmerature.
- The device is added.
Adding the SSR303 relay into the Fibaro system
- Set the control unit into the mode for addding devices Devices –> Add or Remove device -> Add.
- On the SSR303 device hold down the power button >||< until only one LED indicator is lit.
- The device should be added.
Interconnecting the SRT321 thermostat and the SSR303 relay
- On the SRT 321 device turn switch 1 into the position ON.
- Turn the wheel until the display shows A. A starts to blink.
- The relay must be switched off - the red LED indicator is lit. On the SSR303 device hold down the power button >||< and the thermostat shows AP which means that the thermostat and the relay are interconnected.
- On the SRT 321 device turn switch 1 into the position ON.
Note: Finally, it is good to select the following in the advances settings (Advanced): SSR303 relay -> Polling time interval -> Device will be polled at periodic intervals, and to set the interval for example to 10 minutes to have an overview about the position of the relay. The default setting is 15 minutes.
Related articles
How to control your air conditioning wirelessly via Z-Wave?
Inclusion of Remotec ZXT-120 to Fibaro Home Center 2
Wireless control of IR devices through Z-Wave
Wireless control of IR devices through Z-Wave, using iTach devices.
SECURE 7 DAY PROGRAMMABLE THERMOSTAT SET Integration into Fibaro...
Inclusion Programmable Termostat SCS317 into Fibaro System

SECURE 7 DAY PROGRAMMABLE THERMOSTAT SET Integration into VERA UI7
Inclusion Programmable Termostat SCS317 into VERA
How to log into account for remote access via smartphone
How to log into account for remote access via smartphone

How to make a account for remote access to Fibaro System
Registration, creation of a account and adjustment the remote access for Fibaro System.
Related products
Leave a CommentLeave a Reply
Blog categories
Blog search
Latest Comments

SmarterHOME
on Aqara Smart Radiator Thermostat E1 quick start...
Vomáčka Petr DiS.
on Aqara Smart Radiator Thermostat E1 quick start...
SmarterHOME Team
on Shelly devices "Pending connection" issue (FIX)

SmarterHOME Team
on Shelly devices "Pending connection" issue (FIX)

SmarterHOME Team
on Shelly devices "Pending connection" issue (FIX)

SmarterHOME Team
on SHELLY HomeKit Support (Open Source)
Vlada
on SHELLY HomeKit Support (Open Source)
- SMART SOLUTIONS
- About Z-Wave
- Information
- Blog
- Forum
- Brands


- Write us
- B2b
- Trainings
- Contacts
- DISCOUNTS
- Z-Wave Controllers
- Sensors and detectors
- Electrical meters
- Heating and Climate
- Switches and Dimmers
- IP Cameras
- Door Locks
- Wall Plugs
- Window and Blinds Control
- Multimedia Control
- Starter Kits and Bundles
- APPLE HOMEKIT
- Danfoss Link
- WiFi / LAN
- Zigbee
- Other products
- Gadgety
- Refurbished
- DISCOUNTS
6 Comments
Miroslav 19.11.2017 Reply
Dobry den,da sa prosim sparovat koltovy akcny clen priamo na termostaticke hlavice na radiatoroch https://smarterhome.sk/sk/radiatorove-hlavice/eurotronic-spirit-termostaticka-hlavica-378.html ? Aky pocet asociovanych termostatov moze byt na tomto kotlovom akcnom clene ?
SmarterHOME Team 20.11.2017 Reply
Dobrý deň,poprosíme Vás smerovať otázky netýkajúce sa priamo konkrétneho blogu do nášho emailu.
K Vašej otázky Eurotronic Spirit - Termostatická hlavica a ani iná Z-Wave termostatická hlavica neumožňuje priamu associácu k akčnému členu kotla.
Takúto funkciu umožňuje termostat Secure SRT321 zmienený v blogu.
Ak chcete akčný člen kotla ovládať na základe teplôt z hlavíc je potrebné spraviť skript v riadiacej jednotke, napr. vo Fibaro HC2 to môže vyzerať nasledovne:
https://smarterhome.sk/sk/blog/zonove-kurenie-v-systeme-fibaro_59.html
Prajeme príjemný deň.
Robert 12.10.2017 Reply
Dobrý deň, nainštaloval som termostat na Popp Hub2 ..keď otočím koliečkom,na termostate,tak všetko OK ,zmením nastavenie aj v riadiacej jednotke,ale keď dám príkaz z jednotky na zmenu teploty,tak mi napíše toto: 18:26 | Termostat dole je 20 °Cmodule 18:26 | Chyba, počas vykonávania príkazu: Error: Invalid argument ...(viete mi poradiť?) ď.
SmarterHOME Team 24.10.2017 Reply
Dobrý deň,ďakujeme za otázku.
V prvom rade sa uistite, či máte poslednú stabilnú verziu firmvéru Popp Hub 2 a či ste pri pridávaní termostatu do Popp Hub 2 postupovali podľa návodu.
V princípe vždy keď sa posiela príkaz na zmenu teploty z riadiacej jednotky Popp Hub 2 do termostatu Secure SRT321, zmena prebehne vždy pri najbližšom wake-up intervale nastavenom na termostate.
Tento interval sa dá zmeniť defaultne (od výroby) je nastavení na 3600 sekúnd. Prostredníctvom expert módu je možné tento interval prestaviť odporúčame nastavenie na 300 sekúnd. Takže každá nastavená teplota prostredníctvom Popp Hub 2 sa na termostate SRT321 prejaví po 300 sekundách, samozrejme toto nastavenie má potom vplyv na výdrž batérií termostatu, čím nižší interval, tým vyššia spotreba a kratšia životnosť.
O wake up intervale sa viac môžete dočítať na našom blogu - článok Čo sú intervaly Wake Up a Polling?
https://smarterhome.sk/sk/blog/co-su-intervaly-wake-up-a-polling_72.html
V prípade ďalších otázok nás neváhajte kontaktovať.
SmarterHOME Team
Luboš 27.02.2016 Reply
zdravím, dá sa použiť tento termostat na ovládanie kotla aj bez Home Center? Ďakujem.SmarterHOME Team 02.03.2016 Reply
Dobrý deň,Áno, Z-Wave bezdrôtový termostat môžete použiť aj bez Fibaro systému alebo inej Z-Wave riadiacej jednotky. Secure Termostat komunikuje bezdôtovo cez Z-Wave signál s elektrickým relé a spína ho. Takéto nastavenie sa volá asociácia a robí sa aj keď je Fibaro Home Center alebo iná riadiaca jednotka prítomná. Dôvod je ten, že ak z nejakej príčiny, riadiaca jednotka nebude alebo nemôže ovládať Secure termostat, a teda aj el.relé, može sa stále použiť manuálne ovládanie priamo na termostate.