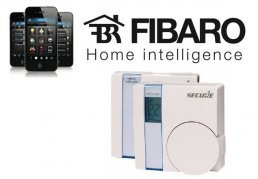
SECURE 7 DAY PROGRAMMABLE THERMOSTAT SET Integration into Fibaro System
Inclusion Programmable Thermostat SCS317 into FIBARO Home Center
Make sure the Thermostat is within 1m of Fibaro Home Center and put Fibaro Home Center into Inclusion mode.
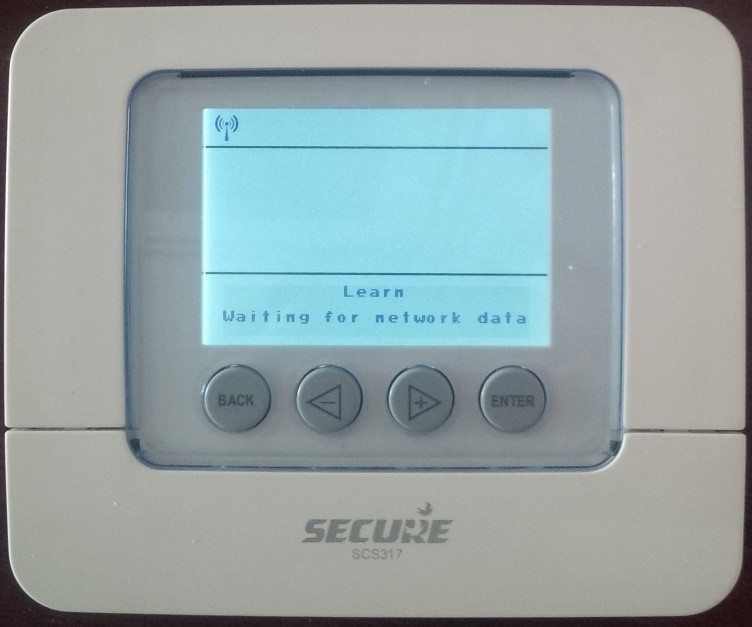
Put the Thermostat into Learning Mode: In the SCS317's menu this is Setup > Set up Z-Wave > Learn'. Press the Thermostat's ENTER' button twice. Scroll through the menu by pressing the + arrow button until Setup appears in the display. Press ENTER. Scroll to Set Up Z-Wave and press ENTER. Scroll to Learn and ENTER.
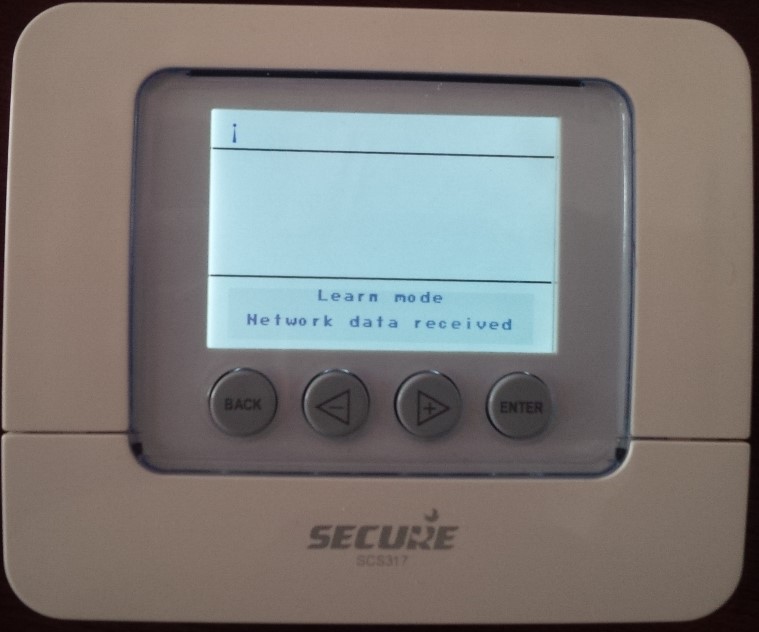
Now you should see message (Waiting for network data).
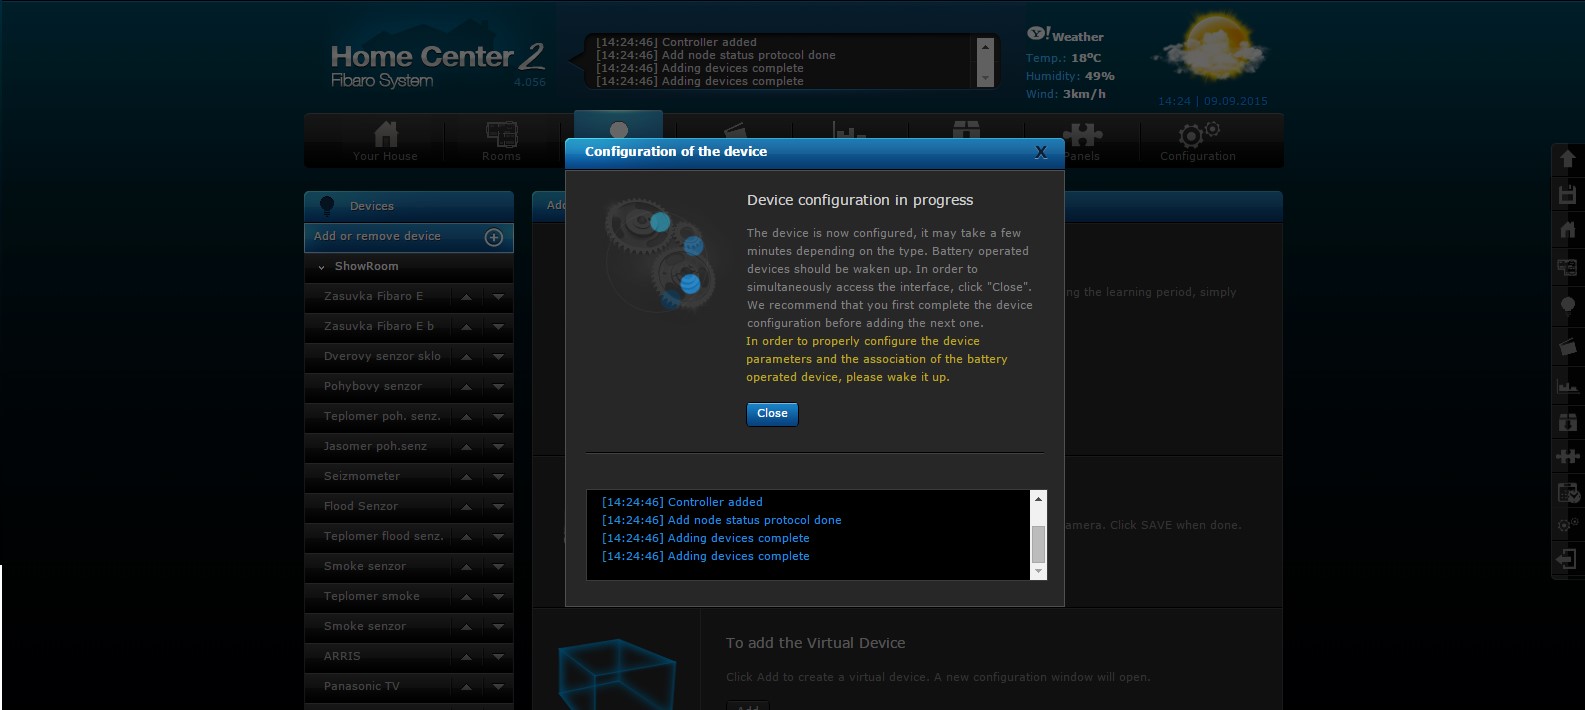
Choose Devices -> Add or remove devices and then klick on Add.
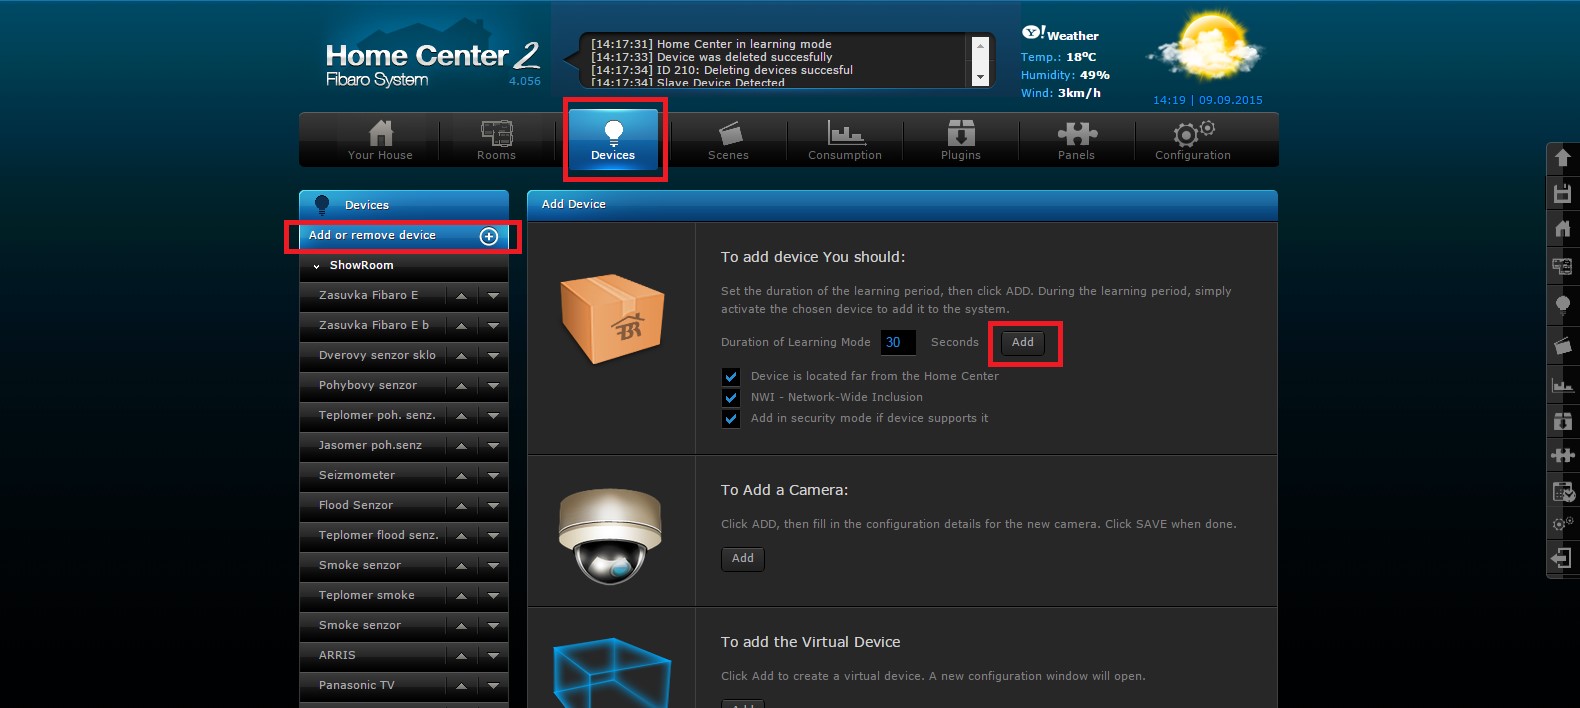
Follow the images.
After this you will see on display SCS317 a message Network data received.
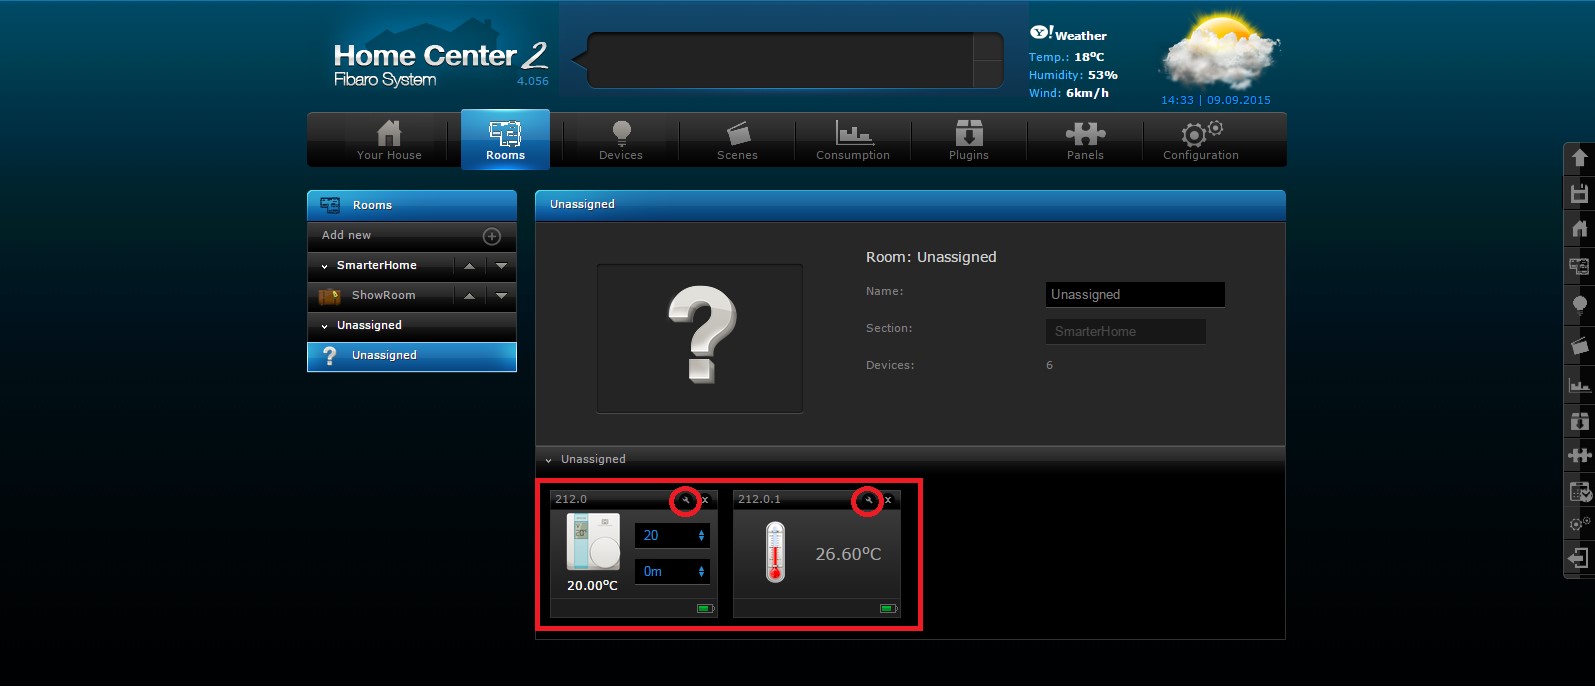
In menu Devices, you can see 2 new icons (on the picture below). First icon show Set temperature and second one show Inside temperature. You can set up this device, look on the picture.
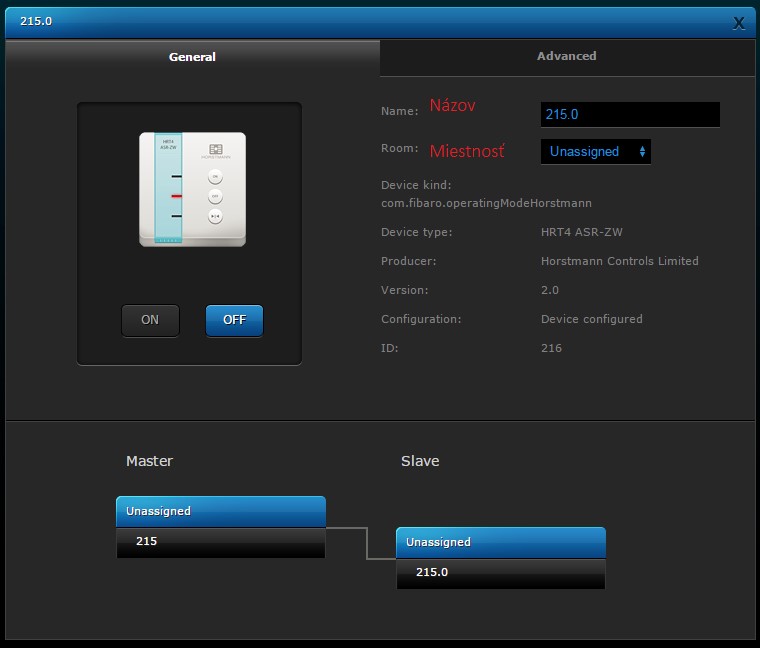
On this page, you can name and place device.
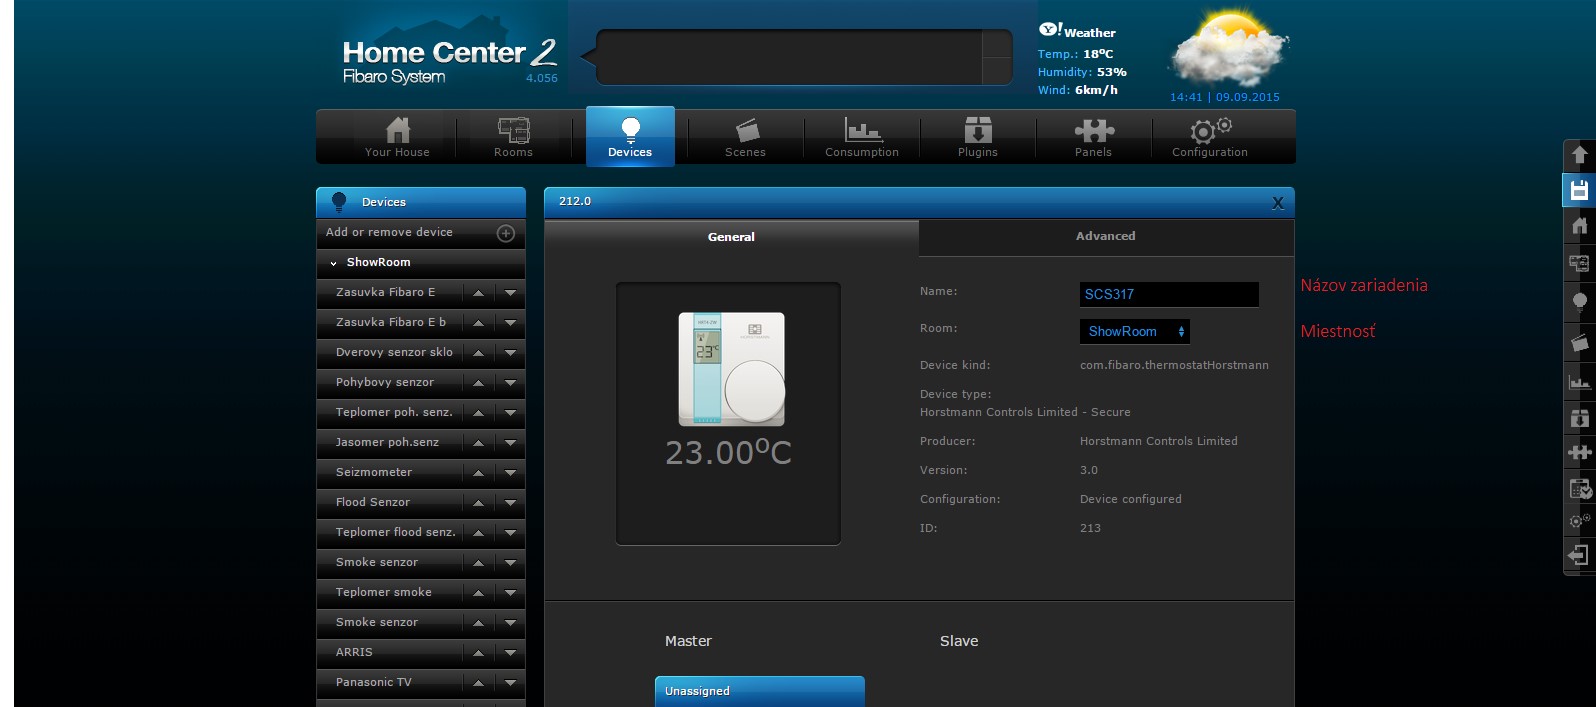
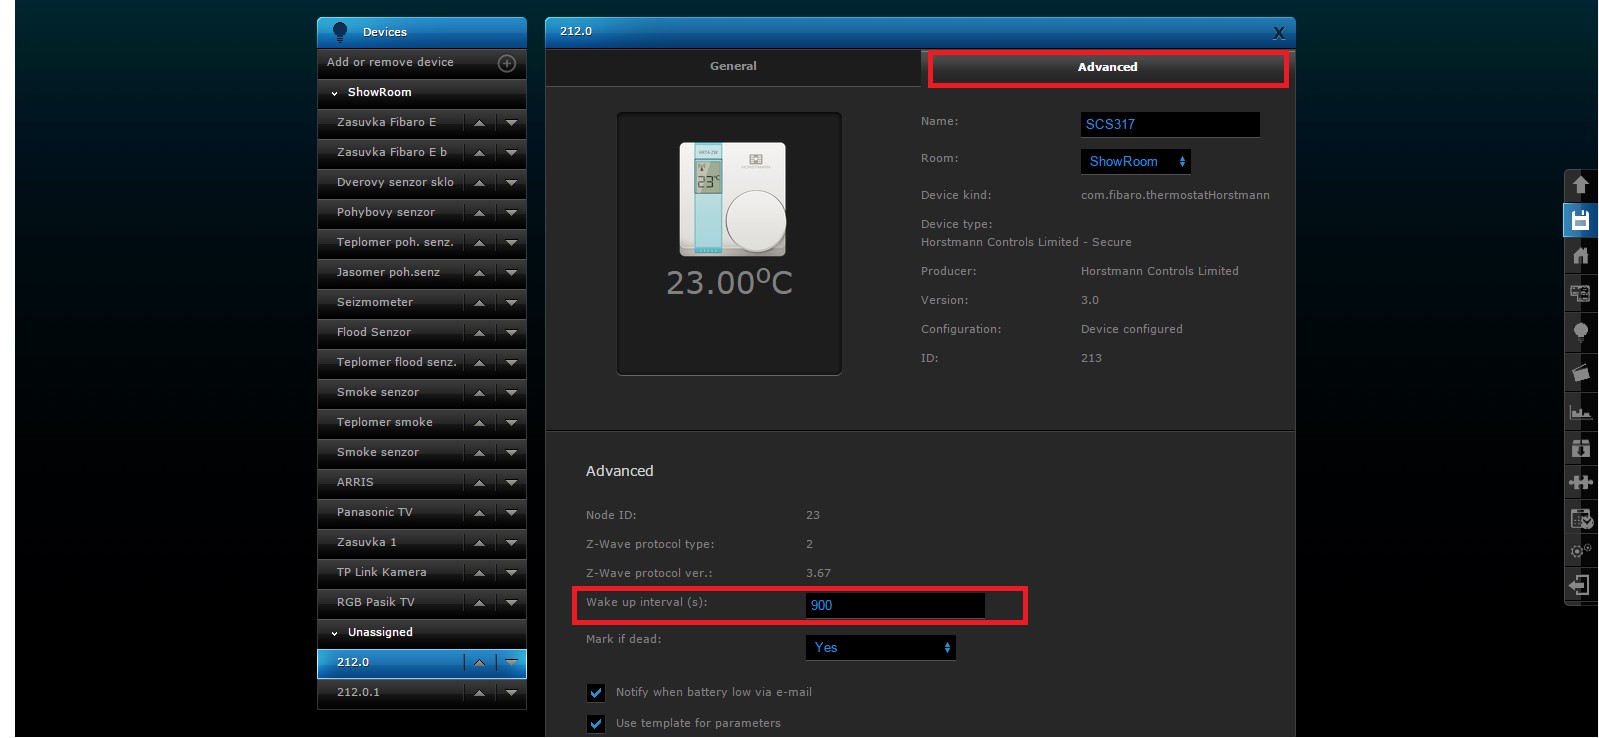
Status of device SCS317.
Wake-up the Thermostat - 'Setup > Set up Z-Wave > Send NIF'. If it still shows the 'Waiting for wakeup to configure device' message, go to the device's 'Settings' tab and click 'Configure node right now' and then wake up device again.
If you want change Wakeup interval (s). You can change this option in Advanced option and there set up Wakeup interval (s).
Adding Receiver SSR303 into Fibaro Center 2
- Install the Secure Receiver into the electrical system following the wiring instructions in the products user manual
- Switch the power on
- Put Fibaro into Inclusion mode. Choose Devices -> Add or remove devices and then klick on Add. Push and hold button (>||< Network button ) on SSR303. After this process, LED in the middle will flash solid red.
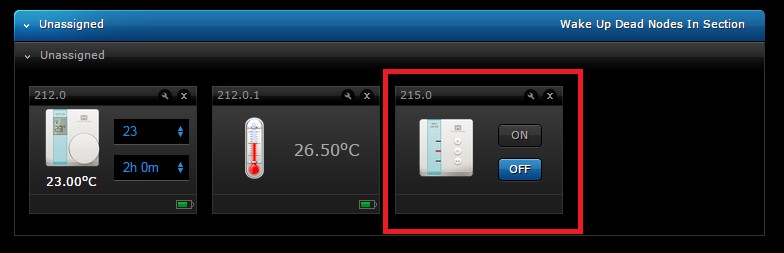
Icon for receiver SSR303 in Fibaro interface.
Connecting Thermostat SCS317 with Receiver SSR303.
- On the SCS317 programmable stat, Press ENTER twice
- Press '-' or '+' to select SETUP
- Press ENTER
- Press '-' or '+' to select SET UP Z-WAVE
- Press ENTER
- This will now show the sub menu available for the Z-Wave wireless communication settings
- Select INCLUDE NODE / RECEIVER , ASSOCIATE NODE
- Press ENTER
- INCLUDING will appear under the INCLUDE NODE heading.
- Press and hold the network button on the SSR303 Receiver until the flashing red light turns to a flashing green light followed quickly by a solid red light
- RECEIVER INCLUDED will now appear in the display of the SCS317. Press BACK and the antenna iconon the top left had corner of the display will show it is active with radio waves.
- The SCS317 and SSR303 Receiver are now 'paired'. The Receiver should receive ON/OFF commands from the Thermostat wirelessly.
Note: Check this by turning the temperature on the SCS317 up and down to see that the SSR303 receiver responds accordingly with a green light for ON and a red light for OFF.
Related articles
How to control your air conditioning wirelessly via Z-Wave?
Inclusion of Remotec ZXT-120 to Fibaro Home Center 2

Configuration of SRT321 thermostat and the SSR 303 FIBARO relay
Configuration of the SRT321 thermostat and SSR 303 FIBARO relay
Wireless control of IR devices through Z-Wave
Wireless control of IR devices through Z-Wave, using iTach devices.

SECURE 7 DAY PROGRAMMABLE THERMOSTAT SET Integration into VERA UI7
Inclusion Programmable Termostat SCS317 into VERA
How to log into account for remote access via smartphone
How to log into account for remote access via smartphone

How to make a account for remote access to Fibaro System
Registration, creation of a account and adjustment the remote access for Fibaro System.
Related products
Leave a CommentLeave a Reply
Blog categories
Blog search
Latest Comments

SmarterHOME
on Aqara Smart Radiator Thermostat E1 quick start...
Vomáčka Petr DiS.
on Aqara Smart Radiator Thermostat E1 quick start...
SmarterHOME Team
on Shelly devices "Pending connection" issue (FIX)

SmarterHOME Team
on Shelly devices "Pending connection" issue (FIX)

SmarterHOME Team
on Shelly devices "Pending connection" issue (FIX)

SmarterHOME Team
on SHELLY HomeKit Support (Open Source)
Vlada
on SHELLY HomeKit Support (Open Source)
- SMART SOLUTIONS
- About Z-Wave
- Information
- Blog
- Forum
- Brands


- Write us
- B2b
- Trainings
- Contacts
- DISCOUNTS
- Z-Wave Controllers
- Sensors and detectors
- Electrical meters
- Heating and Climate
- Switches and Dimmers
- IP Cameras
- Door Locks
- Wall Plugs
- Window and Blinds Control
- Multimedia Control
- Starter Kits and Bundles
- APPLE HOMEKIT
- Danfoss Link
- WiFi / LAN
- Zigbee
- Other products
- Gadgety
- Refurbished
- DISCOUNTS