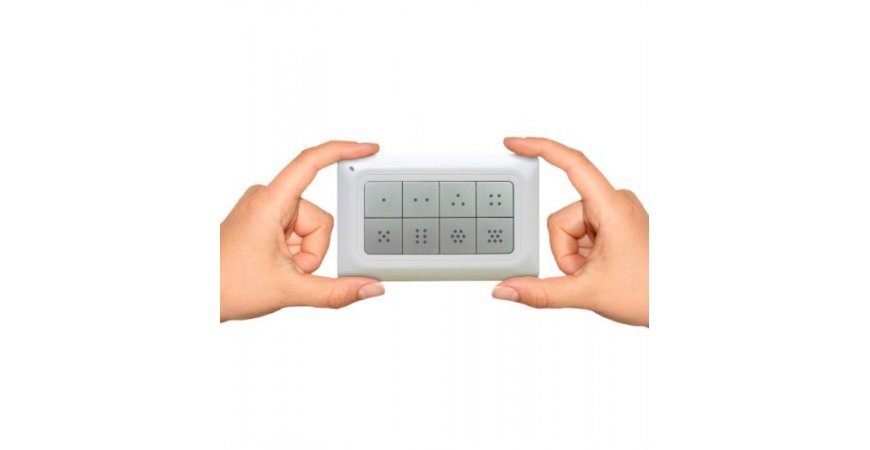
Remote Scene Master (ZRC-90) and Fibaro HC2
If you are lookingfor a controller that can be mounted on a wall or easily move, the Remotec device ZRC-90 may be an ideal solution for you. The device is supplied from batteries (2xAAA) so you do not need any cable when mounting on a wall. The device has 8 buttons, each of them can be pushed once, twice or hold down for a longer period of time. In this way you can start up to 24 scenes using this remote controller.
Adding the device into the Z-Wave network
First it is necessary to add the device into the Z-Wave network created by the Fibaro HC2 control unit. This process is carried out in the following way:

- Start the process for adding the Z-Wave device - Devices panel - Add or remove devices - Add.
- The time interval is started, during it it is necessary to add the device.
- On the Remotec Scene Controller (ZRC-90) hold button W and button L simultaneously for one or two seconds (LED indicator is lit on the back side of the device) and then push only button 1.
- The device is added into the network and then the process is completed.

Finding out the ID of the scene
2-remotec-zrc-90
LUA Scene
The LUA scene for the start of the scenes for the Nodon wall switch looks like this. It is necessary to set it according to your needs. The scene is described in the comments.
Creating a scene - Panel Scenes - > Add scene -> Add scene in LUA
--[[
%% properties
%% events
1219 CentralSceneEvent
%% globals
--]]

-- Číslo 1219 nahraďte ID Číslo vášho Remotec ZRC-90

if (fibaro:countScenes()>1) then
 --fibaro:debug("stop scene")
 fibaro:abort()
end

local pressSource = fibaro:getSourceTrigger()["event"]["data"]
--fibaro:debug(json.encode(pressSource))

-- Tlačidlo 1 až 8 bolo stlačené raz
if (tostring(pressSource["keyAttribute"]) == "Pressed") then
    if (tostring(pressSource["keyId"]) == "1") then
  	fibaro:debug('Tlačidlo 1 bolo stlačené raz')
	fibaro:startScene(11) -- spustí sa scéna s ID 11, nahraďte číslo 11 ID číslom scény, ktorú chcete spustiť
    elseif (tostring(pressSource["keyId"]) == "2") then
  	fibaro:debug('Tlačidlo #2 bolo stlačené raz')
    	fibaro:startScene(12) -- nahraďte číslo 12 ID číslom scény, ktorú chcete spustiť
    elseif (tostring(pressSource["keyId"]) == "3") then
  	fibaro:debug('Tlačidlo #3 bolo stlačené raz') -- pridajte ľubovoľné scény alebo ovládajte jednotlivé zariadenia
    elseif (tostring(pressSource["keyId"]) == "4") then
  	fibaro:debug('Tlačidlo #4 bolo stlačené raz')
    elseif (tostring(pressSource["keyId"]) == "5") then
  	fibaro:debug('Tlačidlo #5 bolo stlačené raz')
    elseif (tostring(pressSource["keyId"]) == "6") then
  	fibaro:debug('Tlačidlo #6 bolo stlačené raz')
    elseif (tostring(pressSource["keyId"]) == "7") then
  	fibaro:debug('Tlačidlo #7 bolo stlačené raz')
    elseif (tostring(pressSource["keyId"]) == "8") then
  	fibaro:debug('Tlačidlo 8 bolo stlačené raz')
  end
end


-- Tlačidlo 1 až 8 bolo stlačené dva razy
if (tostring(pressSource["keyAttribute"]) == "Pressed2") then
  	if (tostring(pressSource["keyId"]) == "1") then
  	fibaro:debug('Tlačidlo 1 bolo stlačené dva razy')
    elseif (tostring(pressSource["keyId"]) == "2") then
  	fibaro:debug('Tlačidlo #2 bolo stlačené dva razy')
    elseif (tostring(pressSource["keyId"]) == "3") then
  	fibaro:debug('Tlačidlo #3 bolo stlačené dva razy')
    elseif (tostring(pressSource["keyId"]) == "4") then
  	fibaro:debug('Tlačidlo #4 bolo stlačené dva razy')
    elseif (tostring(pressSource["keyId"]) == "5") then
  	fibaro:debug('Tlačidlo #5 bolo stlačené dva razy')
    elseif (tostring(pressSource["keyId"]) == "6") then
  	fibaro:debug('Tlačidlo #6 bolo stlačené dva razy')
    elseif (tostring(pressSource["keyId"]) == "7") then
  	fibaro:debug('Tlačidlo #7 bolo stlačené dva razy')
    elseif (tostring(pressSource["keyId"]) == "8") then
  	fibaro:debug('Tlačidlo 8 bolo stlačené dva razy')
  end
end


-- Tlačidlo 1 až 8 bolo stlačené počas aspoň 2 sekúnd
if (tostring(pressSource["keyAttribute"]) == "HeldDown") then
  	if (tostring(pressSource["keyId"]) == "1") then
  	fibaro:debug('Tlačidlo 1 bolo podržané')
    elseif (tostring(pressSource["keyId"]) == "2") then
  	fibaro:debug('Tlačidlo #2 bolo podržané')
    elseif (tostring(pressSource["keyId"]) == "3") then
  	fibaro:debug('Tlačidlo #3 bolo podržané')
    elseif (tostring(pressSource["keyId"]) == "4") then
  	fibaro:debug('Tlačidlo #4 bolo podržané')
    elseif (tostring(pressSource["keyId"]) == "5") then
  	fibaro:debug('Tlačidlo #5 bolo podržané')
    elseif (tostring(pressSource["keyId"]) == "6") then
  	fibaro:debug('Tlačidlo #6 bolo podržané')
    elseif (tostring(pressSource["keyId"]) == "7") then
  	fibaro:debug('Tlačidlo #7 bolo podržané')
    elseif (tostring(pressSource["keyId"]) == "8") then
  	fibaro:debug('Tlačidlo 8 bolo podržané')
  end
end
Removing the device from the Z-Wave network
This process is carried out in the following way:
- Start the process for adding the Z-Wave device - Devices panel - Add or remove devices - Remove.
- The time interval is started, during it it is necessary to remove the device.
- On the Remotec Scene Controller (ZRC-90) hold button L for one or two seconds (LED indicator is lit on the back side of the device) and then push only button 1.
- The device is removed from the network and then the process is completed.
Related articles
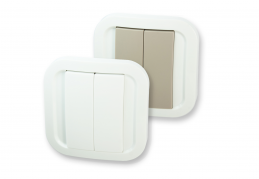
Nodon wall switch and Fibaro HC2
How to use the Nodon wall switch to start scenes with the Fibaro HC2 control unit.

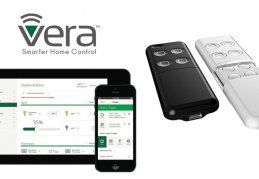
Vera Edge - How to work with scenes and the Minimote controller
Creating a scene and controlling the scenes using the Minimote remote controller
Related products
![Remotec Scene Master [ZRC-90]](https://smarterhome.sk/608-home_default/remotec-scene-master-zrc-90.jpg)
Leave a CommentLeave a Reply
Blog categories
Blog search
Latest Comments

SmarterHOME
on Aqara Smart Radiator Thermostat E1 quick start...
Vomáčka Petr DiS.
on Aqara Smart Radiator Thermostat E1 quick start...
SmarterHOME Team
on Shelly devices "Pending connection" issue (FIX)

SmarterHOME Team
on Shelly devices "Pending connection" issue (FIX)

SmarterHOME Team
on Shelly devices "Pending connection" issue (FIX)

SmarterHOME Team
on SHELLY HomeKit Support (Open Source)
Vlada
on SHELLY HomeKit Support (Open Source)
- SMART SOLUTIONS
- About Z-Wave
- Information
- Blog
- Forum
- Brands


- Write us
- B2b
- Trainings
- Contacts
- DISCOUNTS
- Z-Wave Controllers
- Sensors and detectors
- Electrical meters
- Heating and Climate
- Switches and Dimmers
- IP Cameras
- Door Locks
- Wall Plugs
- Window and Blinds Control
- Multimedia Control
- Starter Kits and Bundles
- APPLE HOMEKIT
- Danfoss Link
- WiFi / LAN
- Zigbee
- Other products
- Gadgety
- Refurbished
- DISCOUNTS