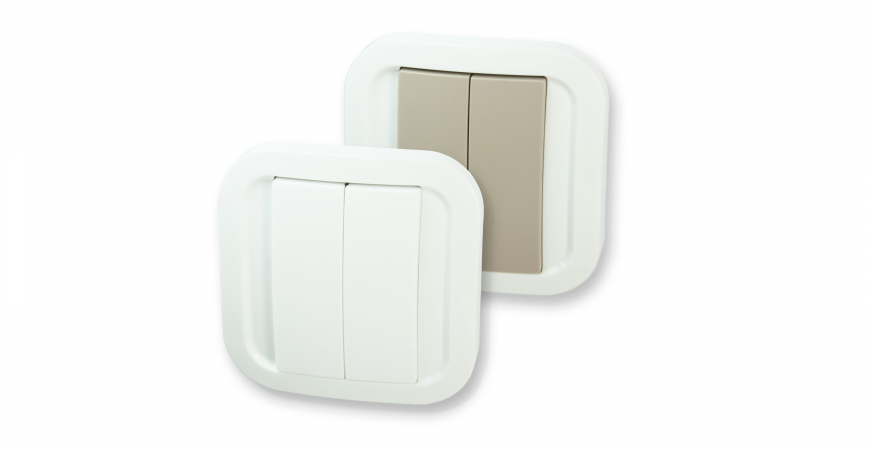
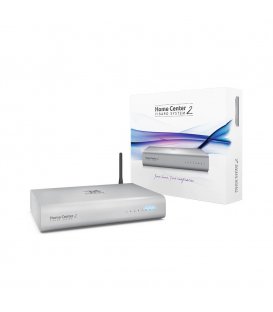
Nodon wall switch and Fibaro HC2
How to use the Nodon wall switch to start scenes with the Fibaro HC2 control unit
Adding the device into the Z-Wave network
First it is necessary to add the device into the Z-Wave network created by the Fibaro HC2 control unit. This process is carried out in the following way:

- Start the process for adding the Z-Wave device - Devices panel - Add or remove devices - Add.
- The time interval is started, during it it is necessary to add the device.
- On the Nodon wall switch hold button 1 and button 2 simultaneously for one or two seconds (LED indicator is pink - on the back side of the device) and then push only button 1.
- The device is added into the network and then the process is completed.
Setting the parameters
Since the device does not have its own template in the Fibaro system it is necessary to set the parameters that allow you to manually start the scene after pushing any button. Set the parameters according to the figure. Do not forget to save the parameters. Then wake up the device to save the parameters. Refresh the page and check if the values of the parameters are correctly set.

- Parameter 1 with the value of 0 allows to start the scenes using butons 1 and 3
- Parameter 2 with the value of 0 allows to start the scenes using butons 1 and 3
- Parameter 3 with the value of 1 is the way of sending out a command to start a scene by the control unit
Note: The parameters are set in the advanced settings of the device.
Finding out the ID of the device

Finding out the ID of the scene

LUA Scene
The LUA scene for the start of the scenes for the Nodon wall switch looks like this. It is necessary to set it according to your needs. The scene is described in the comments.
Creating a scene - Panel Scenes - > Add scene -> Add scene in LUA

LUA Script:
--[[
%% properties
1195 sceneActivation
%% globals
--]]

-- Hore a aj nizsie zmente cislo 1195 na ID vasho zariadenia NodON
local WallSwitch = 1195

local ButtonPressed = tonumber(fibaro:getValue(WallSwitch, 'sceneActivation'))

-- Nemeniť pre Nod On Wall Switch
local Button1_SP = 10 -- jedno kliknutie pre tlacidlo 1
local Button1_DP = 13 -- dva kliknutia pre tlacidlo 1
local Button1_HP = 12 -- dlhsie stlacenie a kliknutie pre tlacidlo 1
local Button1_HR = 11 -- dlhsie stlacenie a pustenie pre tlacidlo 1

local Button2_SP = 20 -- jedno kliknutie pre tlacidlo 2
local Button2_DP = 23 -- dva kliknutia pre tlacidlo 2
local Button2_HP = 22 -- dlhsie stlacenie a kliknutie pre tlacidlo 2
local Button2_HR = 21 -- dlhsie stlacenie a pustenie pre tlacidlo 2

local Button3_SP = 30 -- jedno kliknutie pre tlacidlo 3
local Button3_DP = 33 -- dva kliknutia pre tlacidlo 3
local Button3_HP = 32 -- dlhsie stlacenie a kliknutie pre tlacidlo 3
local Button3_HR = 31 -- dlhsie stlacenie a pustenie pre tlacidlo 3

local Button4_SP = 40 -- jedno kliknutie pre tlacidlo 4
local Button4_DP = 43 -- dva kliknutia pre tlacidlo 4
local Button4_HP = 42 -- dlhsie stlacenie a kliknutie pre tlacidlo 4
local Button4_HR = 41 -- dlhsie stlacenie a pustenie pre tlacidlo 4

-- Nastavte si ID svojich scen
local SC_Scene01 = 11
local SC_Scene02 = 12
local SC_Scene03 = 11
local SC_Scene04 = 12
local SC_Scene05 = 11
local SC_Scene06 = 12
local SC_Scene07 = 11
local SC_Scene08 = 12


if ButtonPressed == Button1_SP then
 -- jedno kliknutie pre tlacidlo 1 spusti scenu pod premennou scene01
  fibaro:startScene(SC_Scene01)
  fibaro:debug("Tlačidlo 1 - vľavo hore bolo stlačené raz")

elseif ButtonPressed == Button1_DP then
 -- dva kliknutia pre tlacidlo 1 spustia scenu pod premennou scene02
   fibaro:startScene(SC_Scene02)
   fibaro:debug("Tlačidlo 1 - vľavo hore bolo stlačené dva krát")

elseif ButtonPressed == Button2_SP then
 -- jedno kliknutie pre tlacidlo 2 spusti scenu pod premennou scene03
  fibaro:startScene(SC_Scene03)
  fibaro:debug("Tlačidlo 2 - vpravo hore bolo stlačené raz")

elseif ButtonPressed == Button2_HP then
 -- dlhsie stlacenie a kliknutie pre tlacidlo 2 zapne zariadenie s ID 1019
  fibaro:call(1019,'turnOn')
  fibaro:debug("Tlačidlo 2 - bolo podržané a stlačené")


elseif ButtonPressed == Button2_HR then
 -- dlhsie stlacenie tlacidla 2 vypne zariadenie s ID 1019
  fibaro:call(1019,'turnOff')
  fibaro:debug("Tlačidlo 2 - bolo podržané a pustené")

elseif ButtonPressed == Button2_DP then
  -- dva kliknutia pre tlacidlo 2 spustia scenu pod premennou scene04
  fibaro:startScene(SC_Scene04)
  fibaro:debug("Tlačidlo 2 - vpravo hore stlačené dva krát")

elseif ButtonPressed == Button3_SP then
 -- jedno kliknutie pre tlacidlo 3 spusti scenu pod premennou scene05
  fibaro:startScene(SC_Scene05)
  fibaro:debug("Tlačidlo 3 - vľavo dole bolo stlačené raz")

elseif ButtonPressed == Button3_DP then
 -- dva kliknutia pre tlacidlo 3 spustia scenu pod premennou scene06
  fibaro:startScene(SC_Scene06)
  fibaro:debug("Tlačidlo 3 - vľavo dole stlačené dva krát")

elseif ButtonPressed == Button4_SP then
 -- jedno kliknutie pre tlacidlo 4 spusti scenu pod premennou scene07
  fibaro:startScene(SC_Scene07)
  fibaro:debug("Tlačidlo 4 - vpravo dole bolo stlačené raz")

elseif ButtonPressed == Button4_DP then
 -- dva kliknutia pre tlacidlo 4 spustia scenu pod premennou scene08
  fibaro:startScene(SC_Scene08)
  fibaro:debug("Tlačidlo 4 - vpravo dole bolo stlačené dva krát")

else
  fibaro:debug('Error, unknown button pressed:' ..  ButtonPressed)
  if ShowDebug == 1 then
    fibaro:debug(ButtonPressed)
  end
end
Removal of the device from the Z-Wave network
This process is carried out in the following way:
- Start the process for adding the Z-Wave device - Devices panel - Add or remove devices - Remove.
- The time interval is started, during it it is necessary to remove the device.
- On the Nodon wall switch hold button 1 and button 2 simultaneously for one or two seconds (LED indicator is pink - on the back side of the device) and then push only button 1.
- The device is added into the network and then the process is completed.
Related products
Leave a CommentLeave a Reply
Blog categories
Blog search
Latest Comments

SmarterHOME
on Aqara Smart Radiator Thermostat E1 quick start...
Vomáčka Petr DiS.
on Aqara Smart Radiator Thermostat E1 quick start...
SmarterHOME Team
on Shelly devices "Pending connection" issue (FIX)

SmarterHOME Team
on Shelly devices "Pending connection" issue (FIX)

SmarterHOME Team
on Shelly devices "Pending connection" issue (FIX)

SmarterHOME Team
on SHELLY HomeKit Support (Open Source)
Vlada
on SHELLY HomeKit Support (Open Source)
- SMART SOLUTIONS
- About Z-Wave
- Information
- Blog
- Forum
- Brands


- Write us
- B2b
- Trainings
- Contacts
- DISCOUNTS
- Z-Wave Controllers
- Sensors and detectors
- Electrical meters
- Heating and Climate
- Switches and Dimmers
- IP Cameras
- Door Locks
- Wall Plugs
- Window and Blinds Control
- Multimedia Control
- Starter Kits and Bundles
- APPLE HOMEKIT
- Danfoss Link
- WiFi / LAN
- Zigbee
- Other products
- Gadgety
- Refurbished
- DISCOUNTS