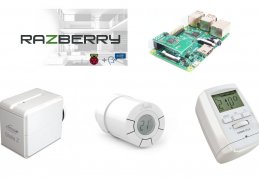
RaZBerry and Raspberry Pi 3 (Z-Way)
RaZBerry and Raspberry Pi 3 (Z-Way)
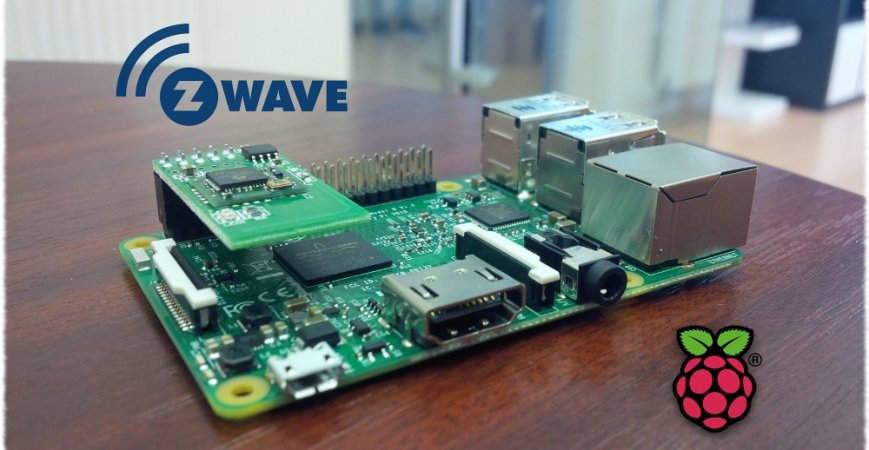
In this blog we will explain how to connect the Z-Wave RaZBerry adapter to the Raspberry Pi, version 3 mini-computer. The main and significant difference between the new Raspberry Pi third version and the older versions is the more powerful hardware and the integration of the Wi-Fi and Bluetooth technologies. This is connected also with problems occuring while using the Z-Wave RaZBerry adapter on Raspberry Pi, version 3. Therefore it is necessary to have the Bluetooth techology switched off while using the RaZBerry adapter. The manufacturer added a script ensuring that after the installation of the Z-Wave interface the Bluetooth technology is automatically switched off.
Brief instructions
- Formatting the Micro SD card
- Downloading the Raspbian operating system (link for downloading) and its writing on the memory card
- Connecting Raspberry Pi 3 into the interner network. Subsequent installation of the Z-Way interface using the command wget -q -O - razberry.z-wave.me/install | sudo bash (using an SSH client, e.g.. PuTTy, or using a monitor or a VNC client).
- Setting the login data into the Z-Way interface and the usage of the Z-Wave network.
Instructions for the preparation of Raspberry Pi 3 for using the Z-Wave RaZBerry adapter
Unfortunately, the manufacturer of this mini-computer has stopped supplying the Micro SD card and therefore it is necessary to provide for such a memory card with the capacity of at least 8 GB. Then insert this card, using a suitable adapter, into the card reader and format it, e.g. by using the SDFormatter software. It is necessary to select the correct unit. |
 |
After this step download the .zip file, that, after extracting, becomes an image file containing the Raspbian operating system, at the moment in the version Jessie. Link for downloading.

After extracting it is necessary to write this image file on a memory card prepared by us, and you can do it easily by using the Win32DiskImager programme. It is necessary to set the correct path to the image file and the correct unit of the memory card.

After completed writing you can connect Raspberry Pi 3 to a power supply that must fulfil the parameters for the 5V DC output signal and 2A. If you have a monitor you can connect it to Raspberry Pi 3 using a HDMI port and simply run the command line. In these instructions we use secured access to the comman line, i.e. SSH using the PuTTy programme. So it is necessary to find out the IP address of Raspberry Pi 3.
You can find out the IP address of Raspberry Pi 3 in a a number of ways, using the following:
- the command line with the command arp –a (if you know the MAC address of the device)
- the web interface of the router
- the dedicated software, e.g. Advanced IP Scanner

PuTTy
Open the SSH client, PuTTY, insert the found IP address into the Host Name (or IP address) field. Click Open. A window with a warning pops out where you must click Yes. Then Raspberry asks you to log in, the default login data are: login: pi password: raspberry. After you have successfully logged in you can enter specific commands into the command line. It is good to have the core of the operating system and the operating system itself to be upgraded, do this by entering the following commands: sudo apt-get update sudo apt-get upgrade sudo apt-get dist-upgrade |
 |
After the updates and upgrades are completed you can finally install the Z-Way interface using the command that is mentioned by the manufacturer on their website:
wget -q -O - razberry.z-wave.me/install | sudo bash

After the process has successfully been competed the message "Thank you for using RaZBerry" should be displayed. Then it is necessary to reset the Raspberry Pi software using the command:
sudo reboot
Z-Way interface
You can enter the Z-Way interface in several ways, you can enter the IP address of our Raspberry Pi into the browser and add the port :8083 (e.g. 192.168.0.137:8083 in our case), or use the website https://find.z-wave.me/zboxweb which is also used to get remote access to the unit.
Then you will be asked to change the factory-set password so you must choose your own password. The factory-set login data are login: admin password: admin. Then you finally enter the Z-Way interface and you can fully use the potential of the control unit.


Tips and tricks, troubleshooting
Tip no.1: We recomment to carry out the adding and removing of devices in the expert mode. You can enter the expert mode for example using 192.168.0.137/expert/, or you can click into the expert mode from the classical mode.

Tip no.2: How to upgrade the firmware of the device. It is very simple, just follow the figures.


Tip no.3: Finding the login data for remote access, remember your the ID of your RaZBerry and set your own password for remote acces. You can enter this screen by using the port :8084 and in our case it is 192.168.0.137:8084, if an error message is displayed you must update the firmware of the device.

Tip no.4: In case of error messages you have to carry out the soft reset of Raspberry Pi, e.g. using PuTTy (enter the IP address of your RaZBerry) and the command sudo reboot.
Note: If you have further technical questions contact us by e-mail or telephone.
Related articles
RaZBerry and Z-Wave thermostatic heads
Instructions for adding various types of the Z-Wave thermostatic heads into the RaZBerry control unit, and...
Leave a CommentLeave a Reply
Blog categories
Blog search
Latest Comments

SmarterHOME
on Aqara Smart Radiator Thermostat E1 quick start...
Vomáčka Petr DiS.
on Aqara Smart Radiator Thermostat E1 quick start...
SmarterHOME Team
on Shelly devices "Pending connection" issue (FIX)

SmarterHOME Team
on Shelly devices "Pending connection" issue (FIX)

SmarterHOME Team
on Shelly devices "Pending connection" issue (FIX)

SmarterHOME Team
on SHELLY HomeKit Support (Open Source)
Vlada
on SHELLY HomeKit Support (Open Source)
- SMART SOLUTIONS
- About Z-Wave
- Information
- Blog
- Forum
- Brands


- Write us
- B2b
- Trainings
- Contacts
- DISCOUNTS
- Z-Wave Controllers
- Sensors and detectors
- Electrical meters
- Heating and Climate
- Switches and Dimmers
- IP Cameras
- Door Locks
- Wall Plugs
- Window and Blinds Control
- Multimedia Control
- Starter Kits and Bundles
- APPLE HOMEKIT
- Danfoss Link
- WiFi / LAN
- Zigbee
- Other products
- Gadgety
- Refurbished
- DISCOUNTS
8 Comments
Dusan 08.12.2020 Reply
Dobry den,je mozne pripojit Z-Wave adapter RaZBerry aj na Raspberry Pi 4 Model B?
Dakujem za reakciu.
SmarterHOME Team 11.12.2020 Reply
Dobrý deň,ďakujeme za dotaz.
My sme nemali možnosť RaZberry 2 otestovať s Raspberry Pi 4 ale podľa všetkého by to malo fungovať.
https://community.home-assistant.io/t/pi-4-setup-with-razberry-v2-solved/160946/3
Pekný deň.
Milan 06.08.2019 Reply
Dobry den.Vedeli by ste mi prosim poradit, rozne ine programy pre windows na ovladanie smarthome. Dakujem
Z-way existuje aj pre windows v dost starej verzii, momentalne to mam na RP3. Chcel by som ale prejst na mini PC s windows, co mi otvori mnoho dalsich moznosti ... pravdupovediac, uz ma "nebavi" linuxova krabicka.
SmarterHOME Team 09.08.2019 Reply
Dobrý deň,ďakujeme za dotaz.
Pre Windows je možné nainštalovať:
Domoticz - https://www.domoticz.com/wiki/Windows
HomeAssistant - https://www.home-assistant.io/docs/installation/windows/ poprípade do Docker-a https://www.home-assistant.io/docs/installation/docker/#windows
OpenHAB2 - https://www.openhab.org/docs/installation/windows.html
Prajeme pekný deň.
Matus 07.12.2017 Reply
Zdravím, smiem sa spýtať, ako to funguje v tomto raZberry, ak si chcem spraviť vlastné uživateľské rozhranie? Napríklad, dá sa, aby raZberry bolo pripojené k sieti cez Ethernet, a prezerať si údaje z Z-wave snímačov cez internetovú stránku. ĎakujemSmarterHOME Team 11.12.2017 Reply
Dobrý deň,ďakujeme za dotaz. Funguje to presne tak ako ste napísal.
Je potrebné urobiť nasledovné:
- Pripravíte si microSD kartu s inštaláciou linuxovej distribúcie Raspbian, kde následne nainštalujete Z-Way softvér (túto službu na požiadavku vieme spraviť za Vás)
- MicroSD vložíte do Raspberry Pi 3 Model B 1GB s pripojeným modulom RaZberry 2
- Nastavíte si prihlasovacie údaje na lokálny aj vzdialený prístup (mimo domácej siete)
- Pridáte Z-Wave zariadenia a nadefinujete si scény
- Kontrolujete a ovládate pripojené zariadenia z domu alebo mimo neho - pomocou PC (web prehliadač), tablet alebo smartfón (aplikácia)
- Užívate si inteligentné bývanie
Prajeme príjemný deň.
SmarterHOME Team
Matúš Fedorčák 16.12.2017 Reply
Dobrý deň, veľmi pekne ďakujem za odpoveď, ak som to správne pochopil, v priloženom Z-way software je možné spraviť vlastnú webstránku v JavaScripte, vrátanie posielania upozorňovacích emailov, alebo úprava uživateľského prostredia v HTML, CSS? Ďakujem.SmarterHOME Team 17.12.2017 Reply
V princípe je možné získať ROOT prístup na Linuxe a meniť HTML a CSS podľa seba.Takisto je možné využiť HTTP API a následne na vytvorenú webstránku, či už v PHP, JavaScripte alebo inom jazyku len posielať informácie o stave zariadení, resp. zariadenia ovládať.
Samozrejme takéto veci vyžadujú experimentovanie, skúsenosti a predovšetkým kopu času.
Z-Way Dev Document dostupný tu:
http://razberry.z-wave.me/docs/zwayDev.pdf
Z-Way HTTP Api dostupný tu:
http://razberry.z-wave.me/docs/Z-WayAPI.pdf
Okrem Z-Way rozhrania na sete RPi3 a module RaZberry môže prevádzakovať aj iné open-source softvérové riešenia ako je OpenHAB 2, HomeAssistant, Domoticz, Domotiga, atď.
Takže možnosti sú veľmi široké. Je len na užívateľovi akou cestou sa vydá.
Prajeme príjemný deň.
SmarterHOME Team