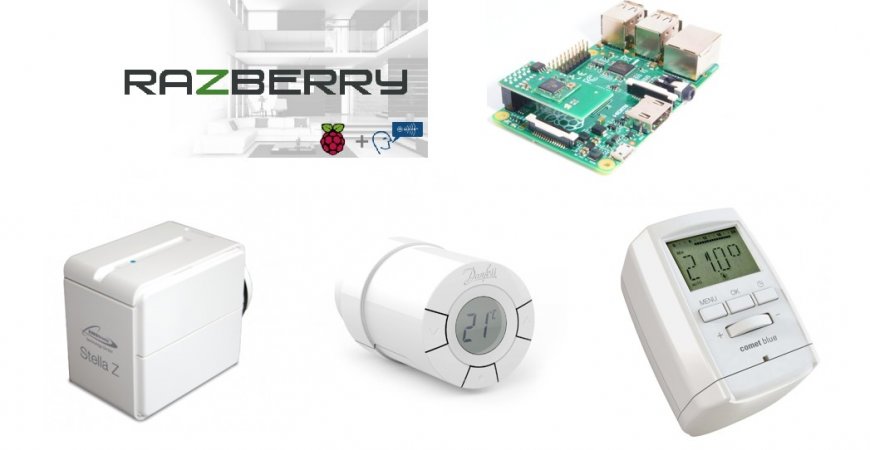
RaZBerry and Z-Wave thermostatic heads
RaZBerry and Z-Wave thermostatic heads
During testing we used the following devices from our offer:
- we used the RaZBerry device as a controller, which connects to the Raspberry Pi mini-computer through GPIO pins


- we used the following thermostatic heads as action devices to control the diameter of the radiator fan:
I. DANFOSS LIVING CONNECT THERMOSTAT
II. EUROTRONIC COMET THERMOSTATIC HEAD
III. STELLAZ THERMOSTATIC HEADS
Setting the Learning mode in the RaZBerry controller:
After logging into the web interface of the RaZBerry controller click the "wheel icon", in the drop-down menu click the Devices option.
Then to be able to add the device click Add new -> Autodetection of a new Z-Wave device -> Start adding. Now it is necessary to push the button for adding on the device you want to add (in the instructions it is described as Inclusion Button/Service button/Program button). Finally, after the successful pairing you can name the added devices and place them into a room. And do not forget to Save your settings.
Danfoss Living Connect Thermostat
First we tested a head from the Danfoss company that offers an elegant design - besides the Z-Wave head they also offer a classic version that looks like the Z-Wave version but it is not possible to control it wirelessly.
Instructions for adding devices (inclusion process)
Before the process of adding devices into the control unit it is necessary to check if the head is in the factory settings; you can find this out if you insert 2 pieces of AA batteries and see if the display shows the following mark (see below). Now you can install the head on the radiator valve.


In the RaZBerry control unit it is necessary to set the so-called Learning mode = mode for adding/removing devices. Set it according to the instructions above. During adding it is necessary to push the button with "a dot". After the successful pairing the display of the thermostatic head shows the degrees of Celsius that indicate the temperature set on the radiator.
Result of the compatibility test:
The DANFOSS LIVING CONNECT THERMOSTAT is fully compatible with the RaZBerry controller.
Note: The Danfoss thermostatic head does not have a temperature sensor to report the ambient temperature.
Eutronic Comet thermostatic head
The next tested thermostatic head was a head from the EUROtronic Technology GmbH company which, besides the display and the wheel for manual temperature control, offers also an integrated sensor to report the ambient temperature. This thermostatic head offers several interesting features such as the detection of open windows or frost protection.


Instructions for adding devices (inclusion process)
During adding and removing devices to/from the Z-Wave network it is important to follow the precise procedure of the manufacturer, namely:
- Uninstall the old thermostatic head, remove it from the valve.
- Remove the cover of the battery by pushing the cover upwards. Insert the batteries. Do not use rechargable batteries! Do not reverse the polarity of the batteries! The display shows PREP. Now the motors is opened completely so that the installation is simpler. When Comet Z-Wave is prepared for the installation the display shows INST. The symbol of the blinking radio antenna means that the device is ready for adding.
- Turn the coupling nut (ring on the product) on the valve. In case the coupling nuts do not fit you need an adapter. Now start the adding mode in your control unit (see the instructions above).
- The countdown begins. Push the button in the box for batteries and hold it down for 5 seconds. The display shows ADAP and the device is initialized. After the initialization the main screen is displayed. INFO: The error code is displayed after a failure.
So we recommend to remove the device first (exlusion):
- Set the control unit into the mode for the removal of devices.
- Push the button in the box for batteries and hold it down for 5 seconds.
Result of the compatibility test:
The EUROTRONIC COMET THERMOSTATIC HEAD is compatible with the RaZBerry controller but the reporting of the ambient temperature does not function.
Stellaz thermostatic head
The last tested thermostatic head from our offer was the head from the EUROtronic Technology GmbH company that has a unique design and does not have a display, it has only a LED indicator. The temperature values are available through the controller interface.

Instructions for adding devices (inclusion process)
During adding and removing devices to/from the Z-Wave network it is important to follow the precise procedure of the manufacturer, namely:
Uninstall the old thermostatic head and install the StellaZ thermostatic head with the necessary adapter. Start the learning mode in RaZBerry and hold down the blue button on the thermostatic head for five seconds.
Result of the compatibility test:
The STELLAZ THERMOSTATIC HEAD is compatible with the RaZBerry controller but the reporting of the ambient temperature does not function because a general template is used for the thermostatic head.
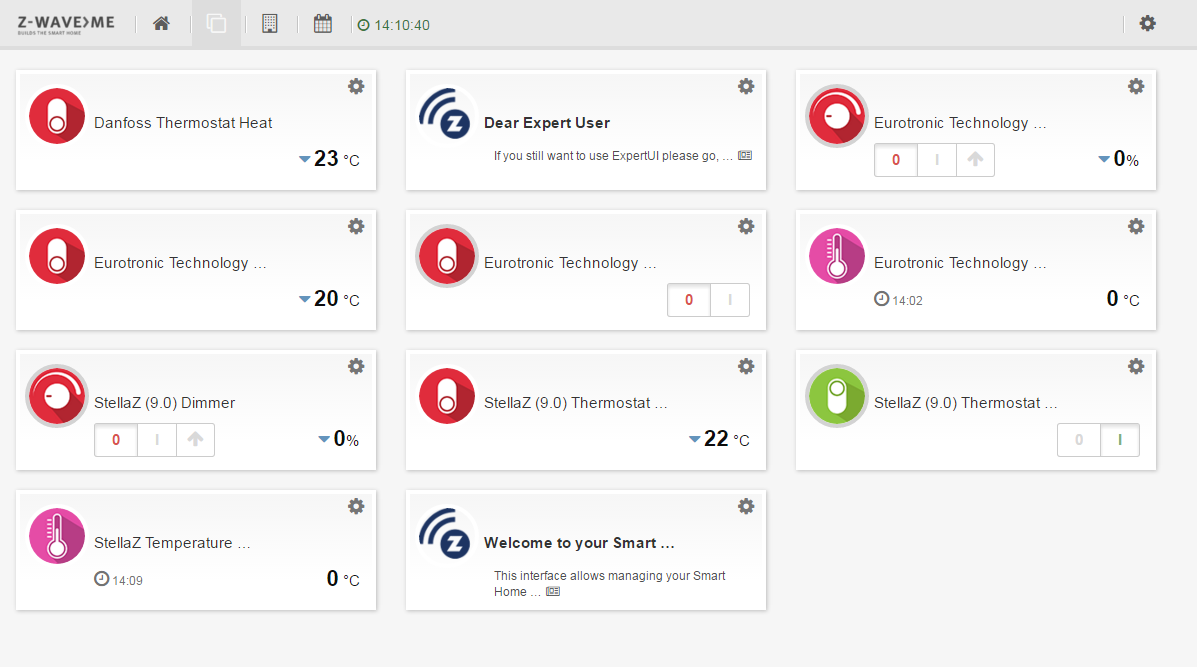
Overview of all thermostatic heads in the RaZBerry interface
Leave a CommentLeave a Reply
Blog categories
Blog search
Latest Comments

SmarterHOME
on Aqara Smart Radiator Thermostat E1 quick start...
Vomáčka Petr DiS.
on Aqara Smart Radiator Thermostat E1 quick start...
SmarterHOME Team
on Shelly devices "Pending connection" issue (FIX)

SmarterHOME Team
on Shelly devices "Pending connection" issue (FIX)

SmarterHOME Team
on Shelly devices "Pending connection" issue (FIX)

SmarterHOME Team
on SHELLY HomeKit Support (Open Source)
Vlada
on SHELLY HomeKit Support (Open Source)
- SMART SOLUTIONS
- About Z-Wave
- Information
- Blog
- Forum
- Brands


- Write us
- B2b
- Trainings
- Contacts
- DISCOUNTS
- Z-Wave Controllers
- Sensors and detectors
- Electrical meters
- Heating and Climate
- Switches and Dimmers
- IP Cameras
- Door Locks
- Wall Plugs
- Window and Blinds Control
- Multimedia Control
- Starter Kits and Bundles
- APPLE HOMEKIT
- Danfoss Link
- WiFi / LAN
- Zigbee
- Other products
- Gadgety
- Refurbished
- DISCOUNTS
5 Comments
lubo 21.01.2021 Reply
Dobrý den, prosim poradit, mám hlavice dolu menovity typ a nedáju sa mi sparovat z 02 smart boxom, alebo s mobilom, ale vypadaju presne tak isto,pravdepodobne mam asi take co sa nedaju ovladat dialkovo, ale co by som chcel vediet ci sa nedaju hlavice naprogramovat, bolo by to super, dakujem za odpoved s pozdravom luboTermostatická hlavica DANFOSS LIVING CONNECT THERMOSTAT
SmarterHOME Team 21.01.2021 Reply
Dobrý deň,ďakujeme za komentár.
V prvom rade si musíte zistiť, či Vaše hlavice podporujú komunikačný protokol Z-Wave - logo na krabičke hlavíc alebo na kryte batérií. Ak takéto logo nemajú tak pracujú pravdepodobne na Danfoss Home Link protokole.
Ak máte Z-Wave mali by ste ich vedieť spárovať s O2 boxom - ak Vám to nefunguje musíte kontaktovať O2 - kvôli podpore a servisu. Alebo si kúpte inú Z-Wave riadiacu jednotku ako je FIBARO Home Center 3 alebo Homey Pro.
Ak máte Danfoss Home Link potrebujete takúto riadiacu jednotku - Danfoss Link CC PSU WiFi Riadiaca Jednotka (014G0288), tá je už ale výbehová a my ju skladom nemáme. https://smarterhome.sk/sk/danfoss-link/danfoss-link-cc-psu-wifi-riadiaca-jednotka-014g0288-432.html
Ďakujeme za pochopenie.
Prajeme pekný deň.
SmarterHOME Team
Milan 05.11.2019 Reply
Keď mi ho prídete namontovať a nainštalovať aby som ho mohol ovládať mobilom cez internet,tak okamžite kupujem!SmarterHOME 06.11.2019 Reply
Vďaka za dotaz.Samozrejme, vieme vám zabezpečiť aj montáž. Obchodných partnerov máme po celom Slovensku a títo vám budú vedieť odborne poradiť a aj produkty nainštalovať.
Ak máte záujem, prosíme pošlite nám požiadavku s vašimi kontaktnými údajmi na info@smarterhome.sk , prípadne nám zavolajte na +421 903 55 44 50.
Ďakujeme.
kenny 19.07.2016 Reply
Dobry den,kde sa nachadza dany sclanok? Na stranke ho nevidim