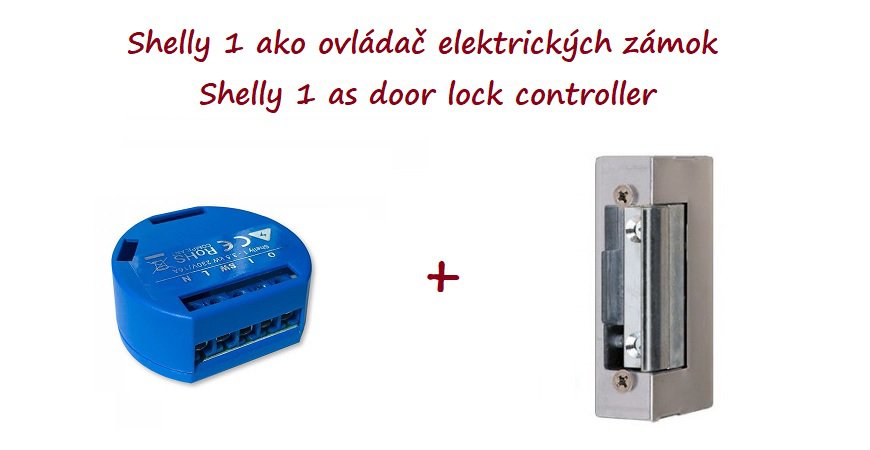
Shelly 1 as door lock controller
This guide is for all people of good will. Just kidding, this guide is about using WiFi module Shelly 1 as door lock controller.
In term of door lock I mean electrical door lock something like you can see at cover blog picture. Electrical door locks traditionally comes in two versions with different power supply. Very common door locks are with 12V DC or AC power supply, second case are 24V DC power supply.
This guide cover using Shelly 1 for controlling 12V DC and 24V DC door locks. You can also control 12V AC door locks with Shelly 1, but Shelly 1 module do not support power supply itself by 12 V AC, so in such case you would need extra wires to power Shelly 1 module and also different operational voltage.
1. wiring - better safe than sorry
So let start, wiring diagram is shown below. I think it is pretty straightforward. Watch out for position of jumper, which determine if Shelly 1 could be power by 12V DC or 24V-60V DC.
Warning!!!: Wiring should be done at best by a certified electrician (even if it is a DC power supply and a lower operating voltage), a person who understands the diagram. You are responsible for making the connection and reproducing the article. We are not responsible for any damage to equipment, property or personal injury caused by incorrect connection.
Wiring diagram
- N = "+" plus power line of 12 / 24V DC
- L = "-" minus power line of 12 / 24V DC
- SW = to this terminal, you can connect traditional wall switch if you want open door lock by pressing wall switch, but it is not mandatory. One side of wall switch is connecting to "-" minus power line of 12 / 24V DC, another one to SW terminal of Shelly 1
- I = input terminal of Shelly 1 for connecting "-" minus power line of 12 / 24V DC
- O = output terminal of Shelly 1 for connecting of door lock
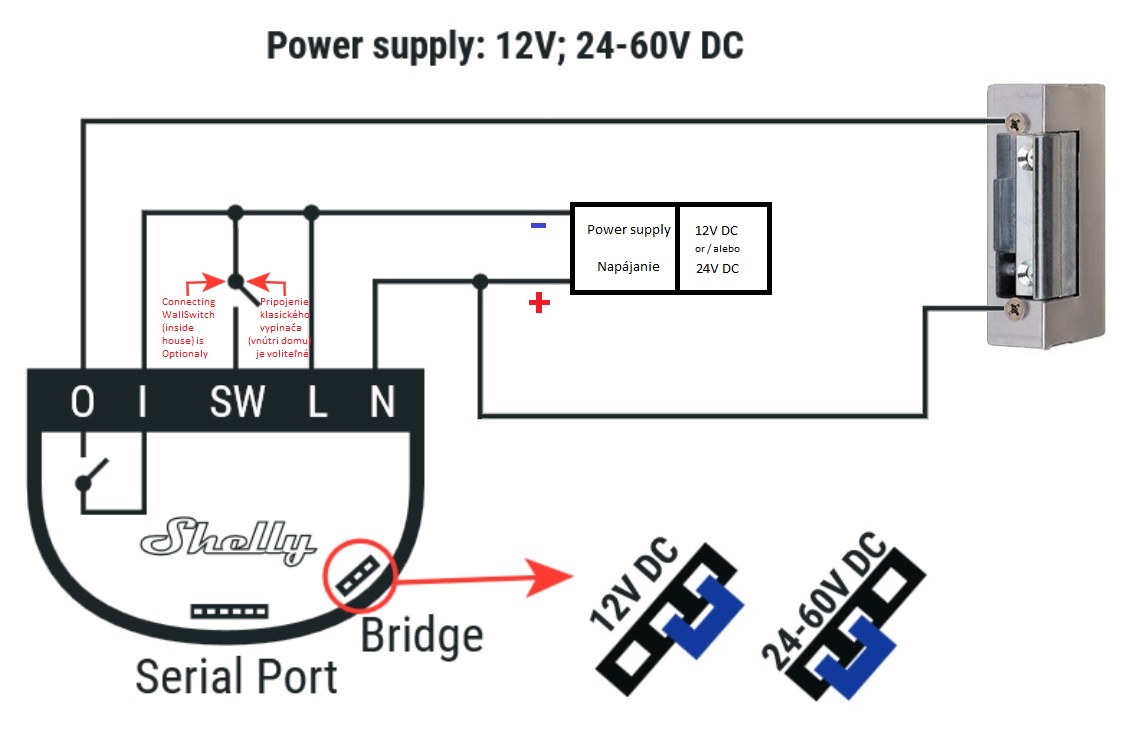
Please check wiring and position of jumper more than once. The most important thing is to comply with the correct polarity of the connection.
2. connecting Shelly 1 to your local WiFi network - almighty wifi
This guide is not mentioning how to connect Shelly 1 to your local WiFi, as it assume that you already know how to do this. But in case you do not know how to connect Shelly 1 to your WiFi just watch this video - link. Also you can check videos at the end of this blog.
3. automatic secure door lock after x seconds - wow it works automatically
After connecting Shelly 1 to your WiFi, please ensure that you set up automatic turning off of output (O, that controll doorlock) after x seconds. X should be replaced with number of seconds, that indicate how long you wish to have unsecure door lock. For example when you press ON the doorlock is unlock and after 3 seconds is lock again.
For setting up this feature, you can use feature Timer in Shelly app. The quote from Shelly 1 manual: "Тo manage the power supply automatically, you may use: Auto OFF: After turning on, the power supply will automatically shutdown after a predefined time (in seconds). A value of 0 will cancel the automatic shutdown."
4. testing, testing, using - it does not works, why? it works, why? try and see
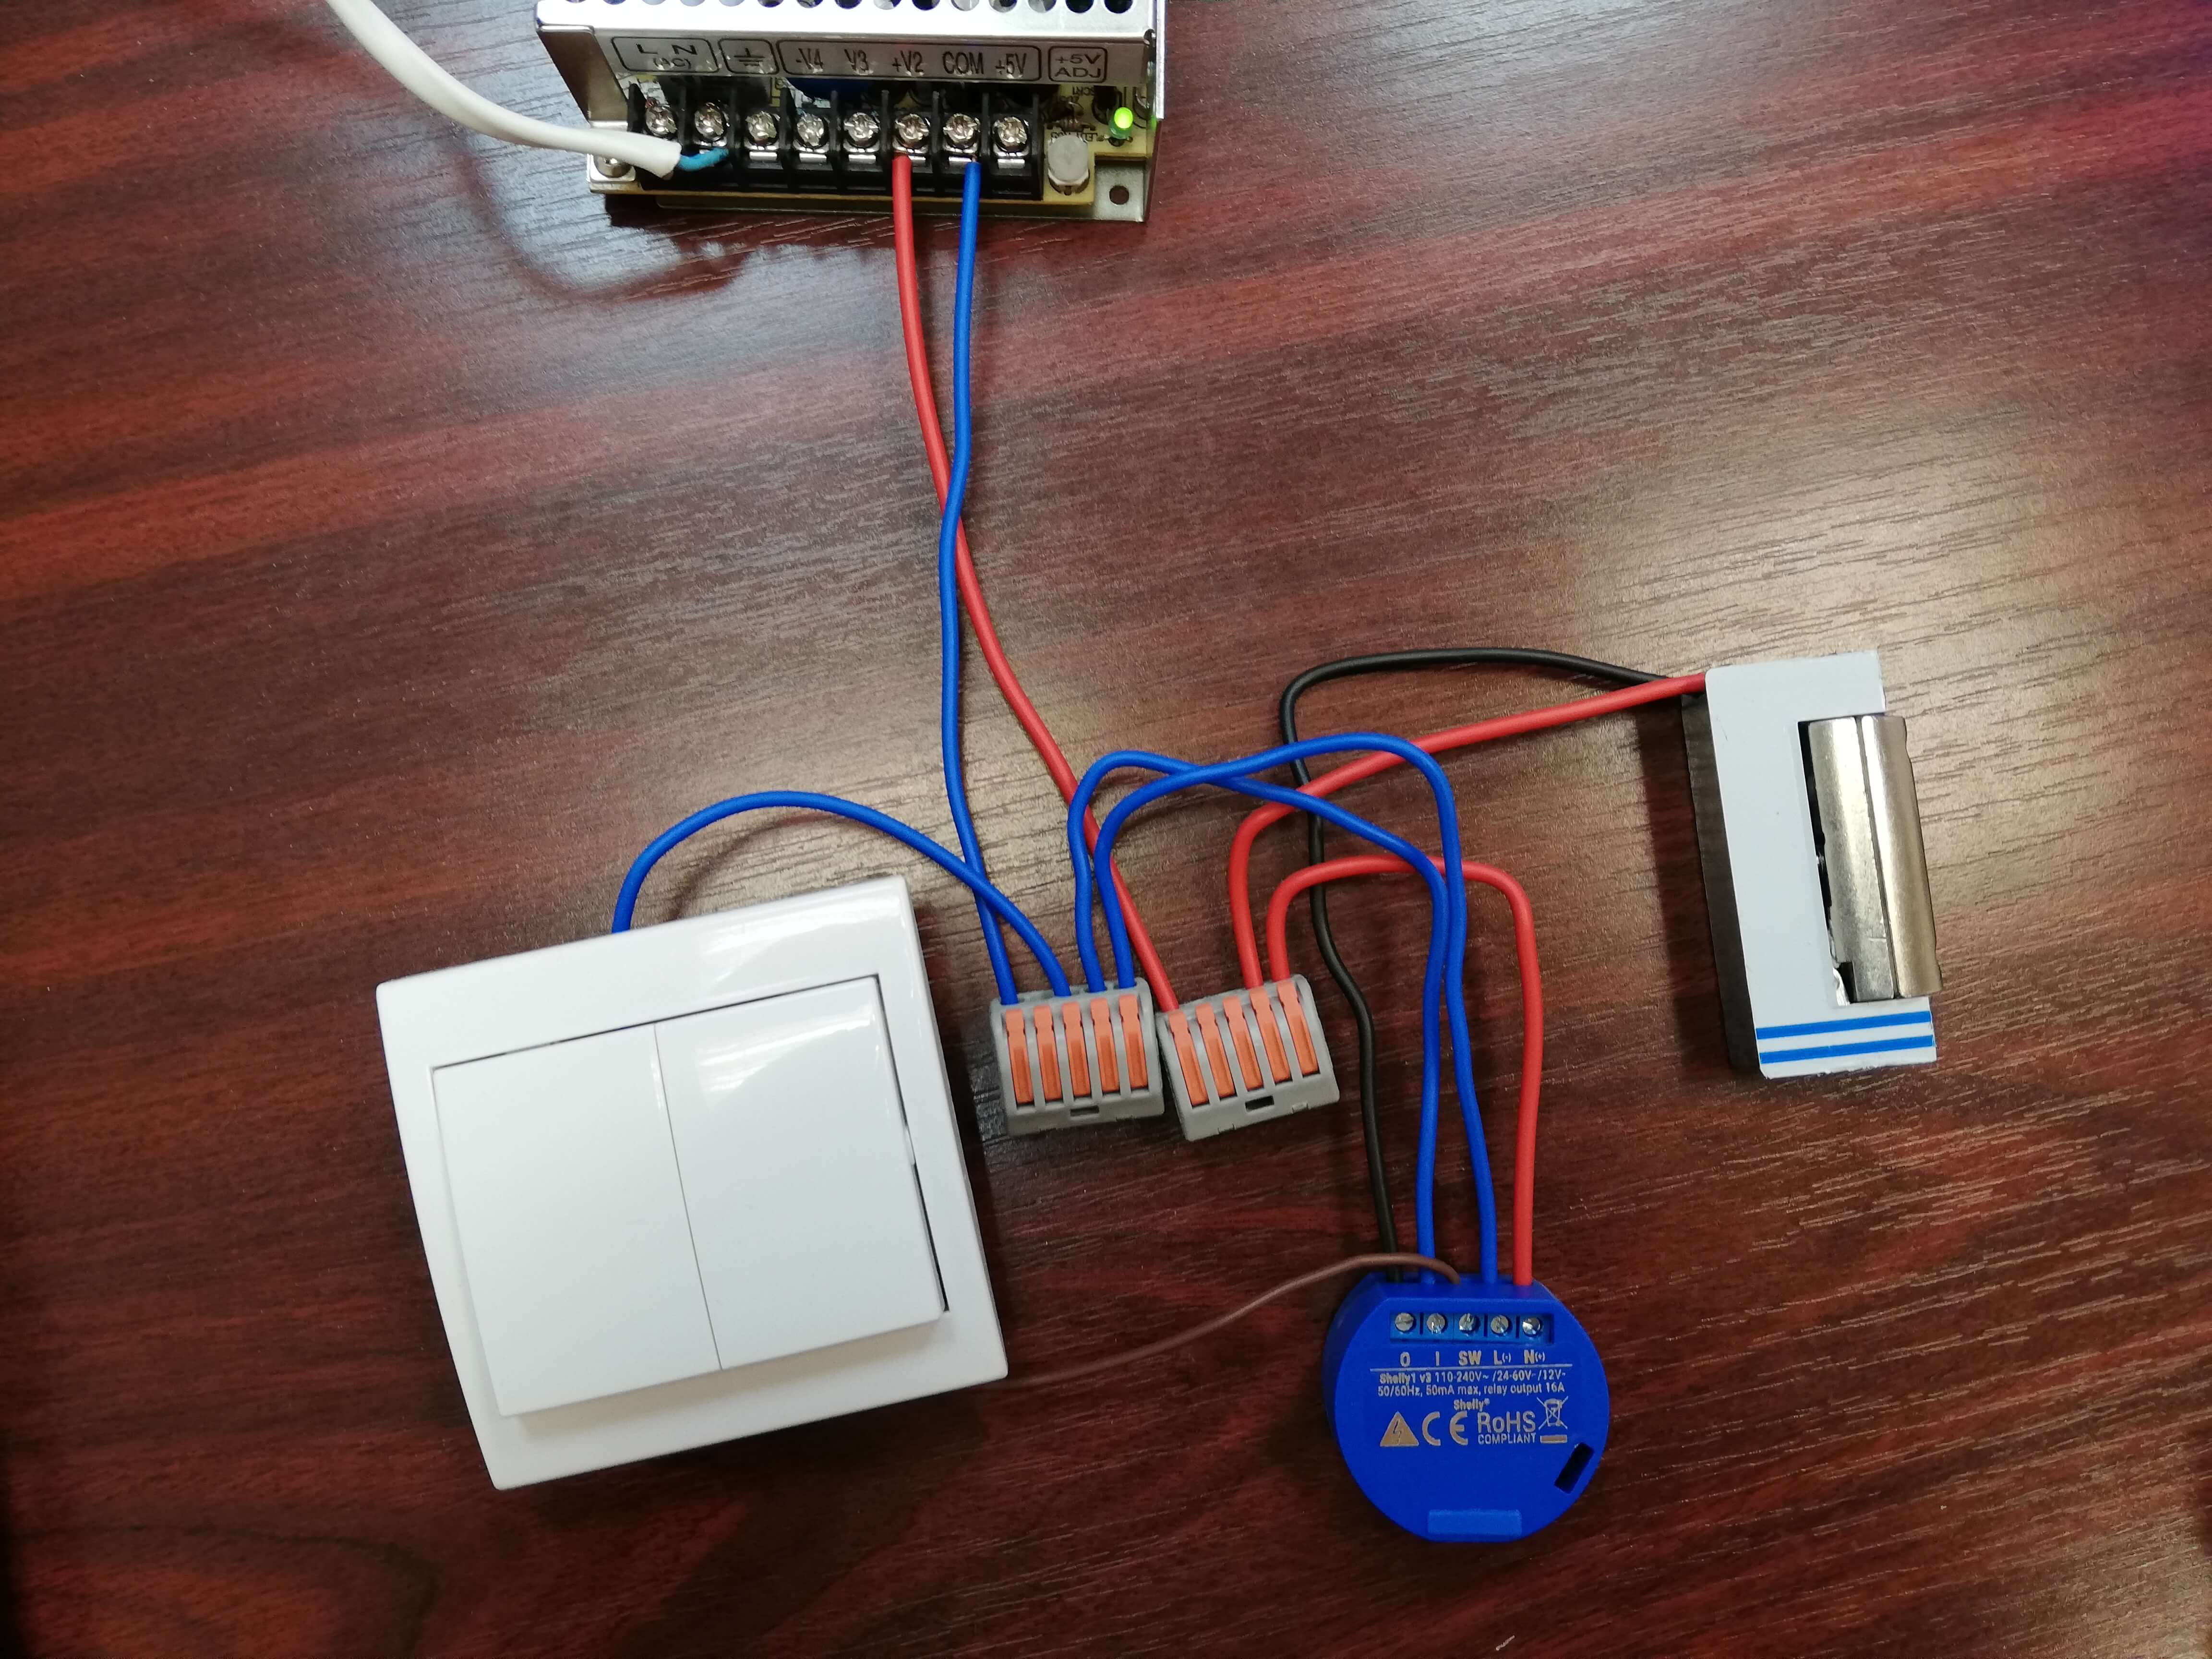
If everything is set, you could switch on Shelly 1 output from Shelly app or trough the wallswitch (if it is connected) and you should hear relay click inside Shelly 1 and also latch of door lock should be ease to push inside. After 3 seconds (or more depends how many seconds you set up) you should again hear relay click inside Shelly 1 and door lock should be still and unable to push latch inside. How it all works when wiring and connection is complete - video below.
Leave a CommentLeave a Reply
Blog categories
Blog search
Latest Comments

SmarterHOME
on Aqara Smart Radiator Thermostat E1 quick start...
Vomáčka Petr DiS.
on Aqara Smart Radiator Thermostat E1 quick start...
SmarterHOME Team
on Shelly devices "Pending connection" issue (FIX)

SmarterHOME Team
on Shelly devices "Pending connection" issue (FIX)

SmarterHOME Team
on Shelly devices "Pending connection" issue (FIX)

SmarterHOME Team
on SHELLY HomeKit Support (Open Source)
Vlada
on SHELLY HomeKit Support (Open Source)
- SMART SOLUTIONS
- About Z-Wave
- Information
- Blog
- Forum
- Brands


- Write us
- B2b
- Trainings
- Contacts
- DISCOUNTS
- Z-Wave Controllers
- Sensors and detectors
- Electrical meters
- Heating and Climate
- Switches and Dimmers
- IP Cameras
- Door Locks
- Wall Plugs
- Window and Blinds Control
- Multimedia Control
- Starter Kits and Bundles
- APPLE HOMEKIT
- Danfoss Link
- WiFi / LAN
- Zigbee
- Other products
- Gadgety
- Refurbished
- DISCOUNTS
21 Comments
Tomáš M. 17.10.2023 Reply
Dobrý den,je možné nastavit automatické zamknutí i po přehrání firmvéru pro podporu HomeKitu?
Předem děkuji za odpověď
SmarterHOME 18.10.2023 Reply
Dobrý deň,to je potrebné potom riešiť v samotnom HomeKit-e.
Pekný deň.
SmarterHOME
Bart Butenaers 03.07.2023 Reply
Hi,Thanks for sharing this nice tutorial! Based on this information, I was able to create a working setup in no time...
However I created a second (completely identical) setup, but that doesn't work: the lock immediately closes when I open it. When I use the Shelly without lock attached, it works fine: when I open the lock, it closes only after 3 seconds (due to the timer I have set).
I have the impression that this is somehow related to the voltage, like e.g. a voltage drop occuring when opening the lock. Because when change the Shelly "POWER ON DEFAULT MODE" setting, that behaviour will start after I open the lock. But not sure...
Do you have any tips, based on your experience?
Thanks! Bart
SmarterHOME Team 03.07.2023 Reply
Hi,what type is your lock, is it NO or NC?
Maybe there is an issue.
SmarterHOME team
Bart Butenaers 07.07.2023 Reply
Hi, it is setup as NO.But I found meanwhile the solution. I had powered my both setups via 12V DC power adapters that 1 bought on AliExpress. These adapters can deliver 1A current, and my door lock consumes about 0,8A. However it seems that the specs of these adapters were a bit too optimistic: one of these adapters could deliver enough current for my first setup, but the other identical adapter not. As soon as my Shelly Switch activates the coil, the voltage from the adapter drops from 12V to below 2V. As a result the Shelly logic executes power-on-default setting, resulting in the relay toggling state immediately.
After using an adapter that can deliver 2A, my problem was immediately solved. Hopefully this information can be of use to others having the same problem.... Thanks again!
Jakub 06.01.2022 Reply
Dobry den, mohu se zeptat, co jste pouzil za zdroj? Dekuji :)SmarterHOME Team 13.01.2022 Reply
Dobrý deň,na fotkách je Spínaný zdroj MEAN WELL RQ-50D.
Pekný deň.
SmarterHOME
miro 12.06.2021 Reply
dobry den , da sa to nejako skombinovat s riesenim na cip/rfid a pouzit ho s najakou citacko na branku ?dakujem .
SmarterHOME Team 12.06.2021 Reply
Dobrý deň,áno, je to možné ak použijete/nájdete RFID čítačku s Relé výstupom a pripojíte ho na SW terminál Shelly 1.
Napr. niečo podobné ale do vnútorného prostredia je - https://smarterhome.sk/sk/rfid-system/hikvision-ds-k1t80m-autonomna-rfid-mifare-citacka-s-klavesnicou-a-rele-vystupom-923.html
Pekný deň.
SH
Vita 09.04.2021 Reply
Dobrý den. Dá se toto řešení nějak přidat do home asistenta?roman plevka 05.05.2021 Reply
shelly podporuje "local only" komunikaciu cez protokol MQTT a ten je v home assistante podporovany.Osobne si shelly flashujem alternativnym firmwareom: Tasmota - ten ma v HA uz hotovou integraciu, alebo podporuje HA discovery po MQTT
SmarterHOME Team 12.04.2021 Reply
Dobrý deň,ďakujeme za dotaz.
Podporu pre HomeAssistant nerobíme.
Každopádne podpora Shelly výrobkov v HomeAssistante by mala byť dostupná - https://www.home-assistant.io/integrations/shelly/
Takže ak pripojíte Shelly do HomeAssistantu tak nevidíme problém aby obdobné ovládanie nefungovalo.
Ďakujeme za pochopenie.
Pekný deň.
SH
Lukas 19.03.2021 Reply
Rozběhám to i pro HomKit?SmarterHOME Team 20.03.2021 Reply
Dobrý deň,ak si nahráte do Shelly 1 firmvér pre HomeKit tak áno.
Návod - https://smarterhome.sk/sk/blog/shelly-homekit-podpora-open-source_134.html
Pekný deň.
SmarterHOME
Mp 27.02.2021 Reply
How to make it with a Keypad that also open it?SmarterHOME Team 01.03.2021 Reply
Hello,thank you for question.
It is possible you need Keypad with relay and this relay should be able to control voltage, that you will use for electronic door lock.
And then this Keypad will be connected to Shelly 1 as traditional wallswitch - wiring scheme in article.
Have a nice day.
Dezider 31.01.2021 Reply
Dobry den, neviete nahodou ako treba pridat potom shelly modul do googlu aby fungoval na prikaz lock a unlock door? dakujemSmarterHOME Team 03.02.2021 Reply
Dobrý deň,takáto funkcia zatiaľ v integrácii medzi Shelly a Google Assistantom nie je podporovaná. Ak to chcete zmeniť musíte skôr napísať priamo do Shelly https://shelly.cloud/support/
Používať môžete príkaz - Turn ON/OFF.
Turn ON/OFF device
Turn/Switch/Power ON [device name]
Turn/Switch/Power OFF [device name]
Ex: “Hey Google, Power on Iron”
https://shelly.cloud/support/compatibility/
Pekný deň.
Pavel Mazanec 14.12.2020 Reply
Dobrý den, není na obrazku viz zapojení, otocena polarita? Děkuji za odpověďSmarterHOME Team 15.12.2020 Reply
Dobrý deň,Ďakujeme za dotaz.
Polarita je v poriadku - https://shelly.cloud/wp-content/uploads/2020/06/shelly1_wiring_dc.jpg
Pekný deň.
SmarterHOME Team
Pavel Mazanec 18.01.2021 Reply
Děkuji vám za odpověď.