Aeon Labs - changing the colour of the LED bulb in Fibaro
Aeon Labs LED bulb - changing the colour in the Fibaro control units
Simple instructions on how to change the colour of the smart bulb in the Fibaro control units
Since the Aeon Labs LED bulb in the control units from the Fibaro company does not have full support and it is possible to use the dimmer function only in the cold white colour:
- for the owners of the Fibaro Home Center 2 control units - we offer a solution in the form of a virtual device that has a loop in the LUA scripting language, therefore it is not possible to import this virtual device into the Fibaro Home Center Lite control unit. In the virtual device you can mix any colours.
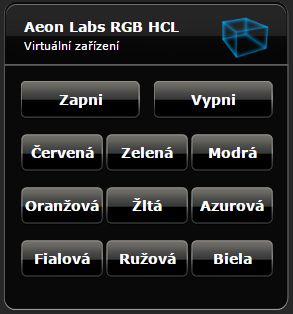
- for the owners of the Fibaro Home Center Lite control units - we offer a solution in the form of a virtual device that allows to change the colour of the bulb to pre-set colours with the option to complete it by custom colours.
Compatibility with other control units
The Aeon Labs LED bulb is fully compatible with other control units such as Vera Edge, Vera Plus or RaZberry and Popp Hub so you can change the colours without any additional configuration.
Note: You can use the white cold colour of the bulb only separately, this means that it overwrites the other colour settings.
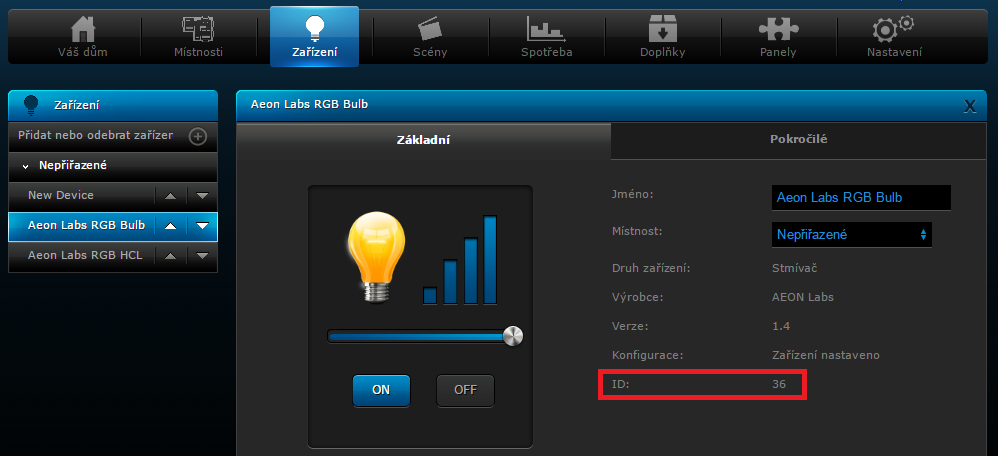
Finding out the ID of the Aeon Labs LED bulb
At the beginning it is necessary to find out the ID of the bulb and note it down, later you will need this number for the modification of the imported virtual device. It is easy to find out the ID of the device. Click the settings of the Aeon Labs LED bulb and in the basic settings you wil see the ID of this device (note it down).
Import of a virtual device
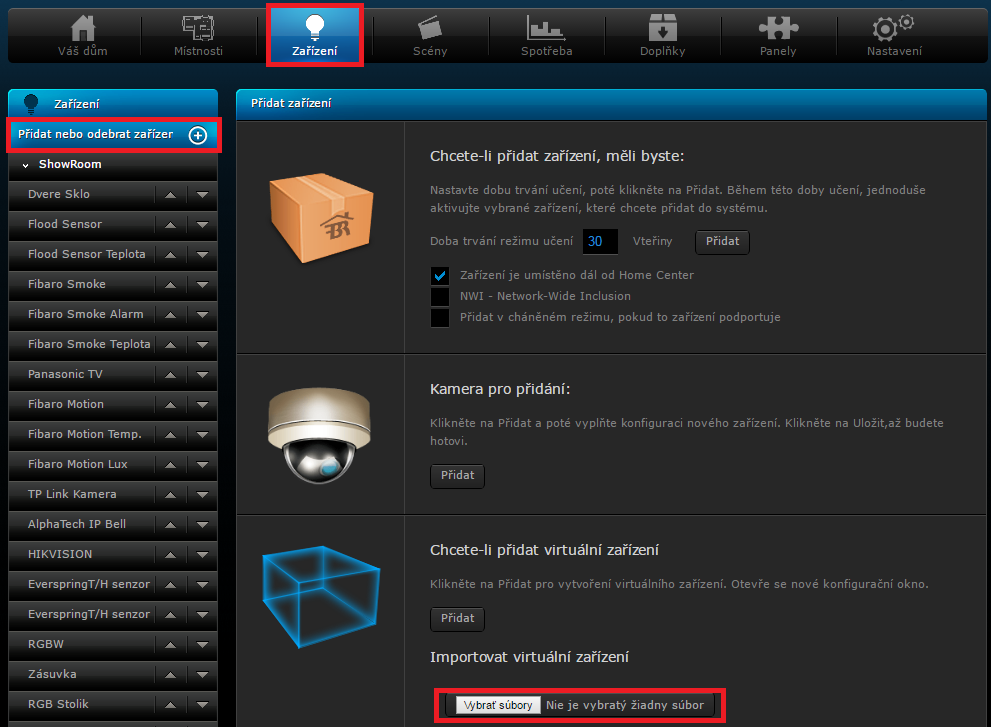
The procedure for the import of a virtual device is the same for both control units. Be careful to enter the correct file. The configuration and the additional settings of the virtual device are different for each device. Follow the instructions for your control unit.
In the Devices panel select Add or remove devices at the end of the page Import a virtual device -> select the respective file.
For Home Center 2 it is the file Aeon Labs RGB HC2.vfib
For Home Center Lite it is the file Aeon Labs RGB HCL.vfib
Fibaro Home Center 2 – Virtual device
After the import of the correct file the imported virtual device will be automatically opened. Click the Advanced item. Now roll down to the end of the page where you can see the window called Main loop.
In this window first change the number called Lamp to the number of the Aeon Labs LED bulb you had found out - how to find it out is described above.
Then enter two hyphens into the line where you can find the command os.exit(), it will look like this:
-- os.exit()
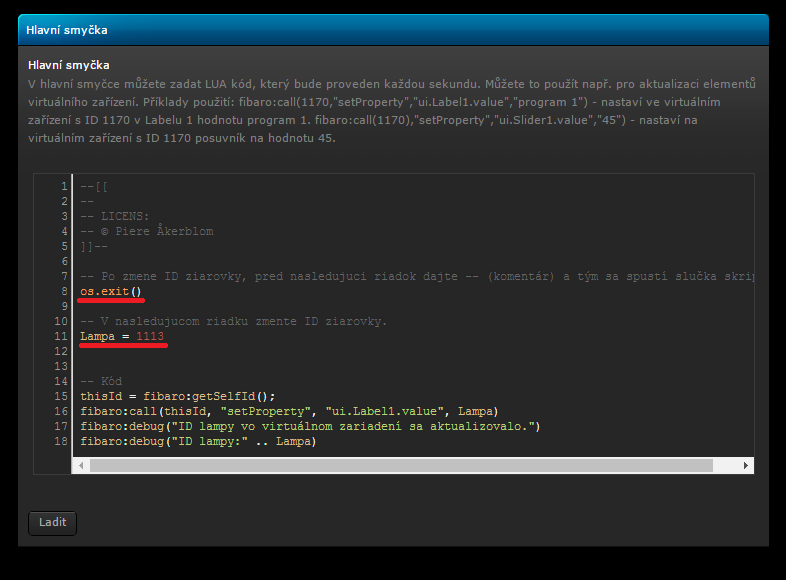
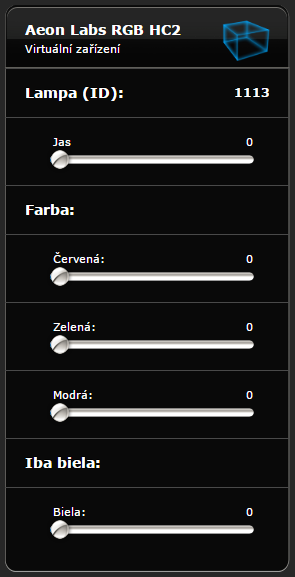
Then do not forget to save the device. Now you are able to change the colours of the bulb.
Fibaro Home Center Lite – Virtual device
After the import of the correct file the imported virtual device will be automatically opened. Click the Advanced item.
First it is necessary to change the IP address of the virtual device to 127.0.0.1 and the TCP port to 11111.
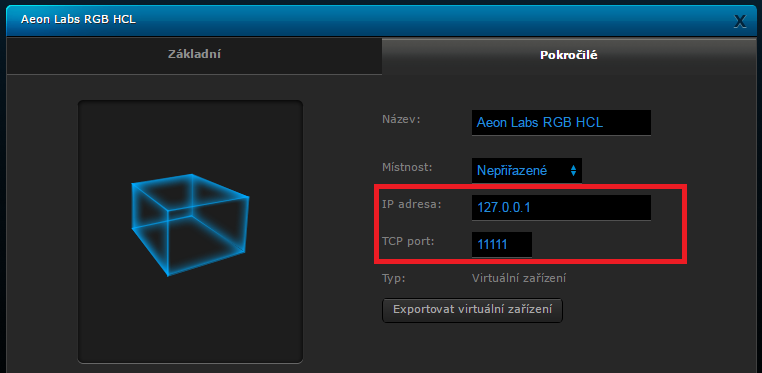
Scroll down the page. If you want to control your RGB bulb using this virtual device it is necessary to change the ID number in the virtual device for each window. See the figure below.
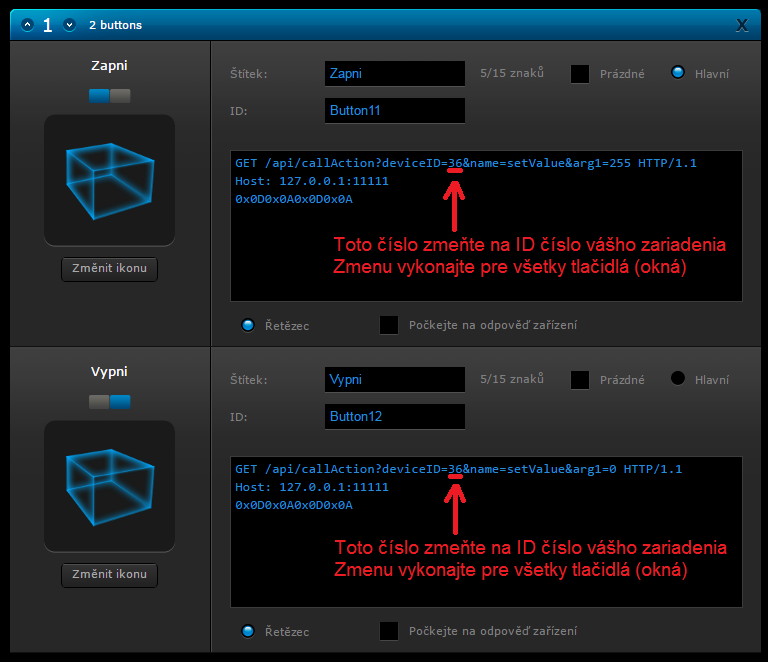
Do not forget to save the device, then you will be able to change the colours of your RGB bulb.



























6 Comments
Marek 31.05.2017 Reply
Ďakujem pekne za cenne rady!!! Po pridaní AEON žiarovky do sýtemu fibaro mi nabehla už aj šablóna k tejto žiarovke, teda fibaro ju ma už v systéme a nieje potrebne riešiť virtuálne zariadenie...SmarterHOME Team 02.06.2017 Reply
Áno, ďakujeme aj my za informáciu, že v posledných aktualizáciách softvéru pre riadiace jednotky Fibaro už pridali template (šabĺónu) pre zariadenie Aeon Labs LED žiarovka. Takže virtuálne zariadenie nie je nutné riešiť avšak je možného ďalej využiť napr. v iných scénach.Marek 17.05.2017 Reply
Na virtualnom zariadeni k ziarovke AEON nie je mozne pre HCL pridat fuknciu stmievania????SmarterHOME Team 18.05.2017 Reply
Dobrý deň,bohužiaľ v prípade jednotky HCL nie možné pridať do virtuálneho zariadenia slajder na ovládanie stmievania, kvôli absencii LUA programovacieho jazyka. Do virtuálneho zariadenia by sa dali pridať tlačidlá s definovanými percentuálnymi hodnotami intenzity svetla. Inak je možné žiarovku AEON stmievať v hlavnom rozhraní FIBARO systému.
Marek 23.05.2017 Reply
V tom prípade je to celkom potenciálna AEON žiarovka ak sa dá nastaviť presná intenzita svetla. Viete mi poradiť ako nakódujem tlačítko pre danú intenzitu osvetlenia do virtuálneho zariadenia? ĎAKUJEM pekne! Ešte mám jednu otázočku trošku mimo tejto žiarovky, viete mi poradiť v akom formáte mám vložiť obrázok ak chcem zmeniť obrázok napr. virtuálneho zariadenia? Viem akurát, že musí mať rozlíšenie 128x128....skúšal som rôzne formáty jpg., ico.....ale nevedelo mi to tam nahrať!SmarterHOME Team 26.05.2017 Reply
Tlačidlo do virtuálneho zariadenia pridáte veľmi jednoducho. Otvoríte si virtuálne zariadenie, kde si otvoríte pokročilé nastavenia. Následne vyberiete či chcete pridať jedno/dva/tri/štyri tlačidlá a tlačidlá následne pomenujete a vložíte do každého tlačidla nasledujúci kód, ktorý je potrebné upraviť.GET /api/callAction?deviceID=36&name=setValue&arg1=255 HTTP/1.1
Host: 127.0.0.1:11111
Interval jasu sa dá definovať v rozmedzí 0-255, pričom 0 je vypnutá žiarovka a 255 je maximálny jas. Podľa potreby teda zmeňte hodnotu 255 v príkaze na želanú hodnotu jasu, pre každé tlačidlo zvlášť a úpravy nezabudnite uložiť.
Pri zmene ikon je odporúčané používať formát PNG, v rozmeroch 128x128 s priehľadným pozadím.