Integration of IP Bell – 02C into the Fibaro interface
Thanks to the AlphaTech Technologies company, we had an opportunity to see and test the IP Bell - 02C device with the Fibaro system.
Used devices:
Control unit - Fibaro Home Center 2 version 4.059 BETA
Input security equipment - IP Bell – 02C from the ALPHATech Technologies company
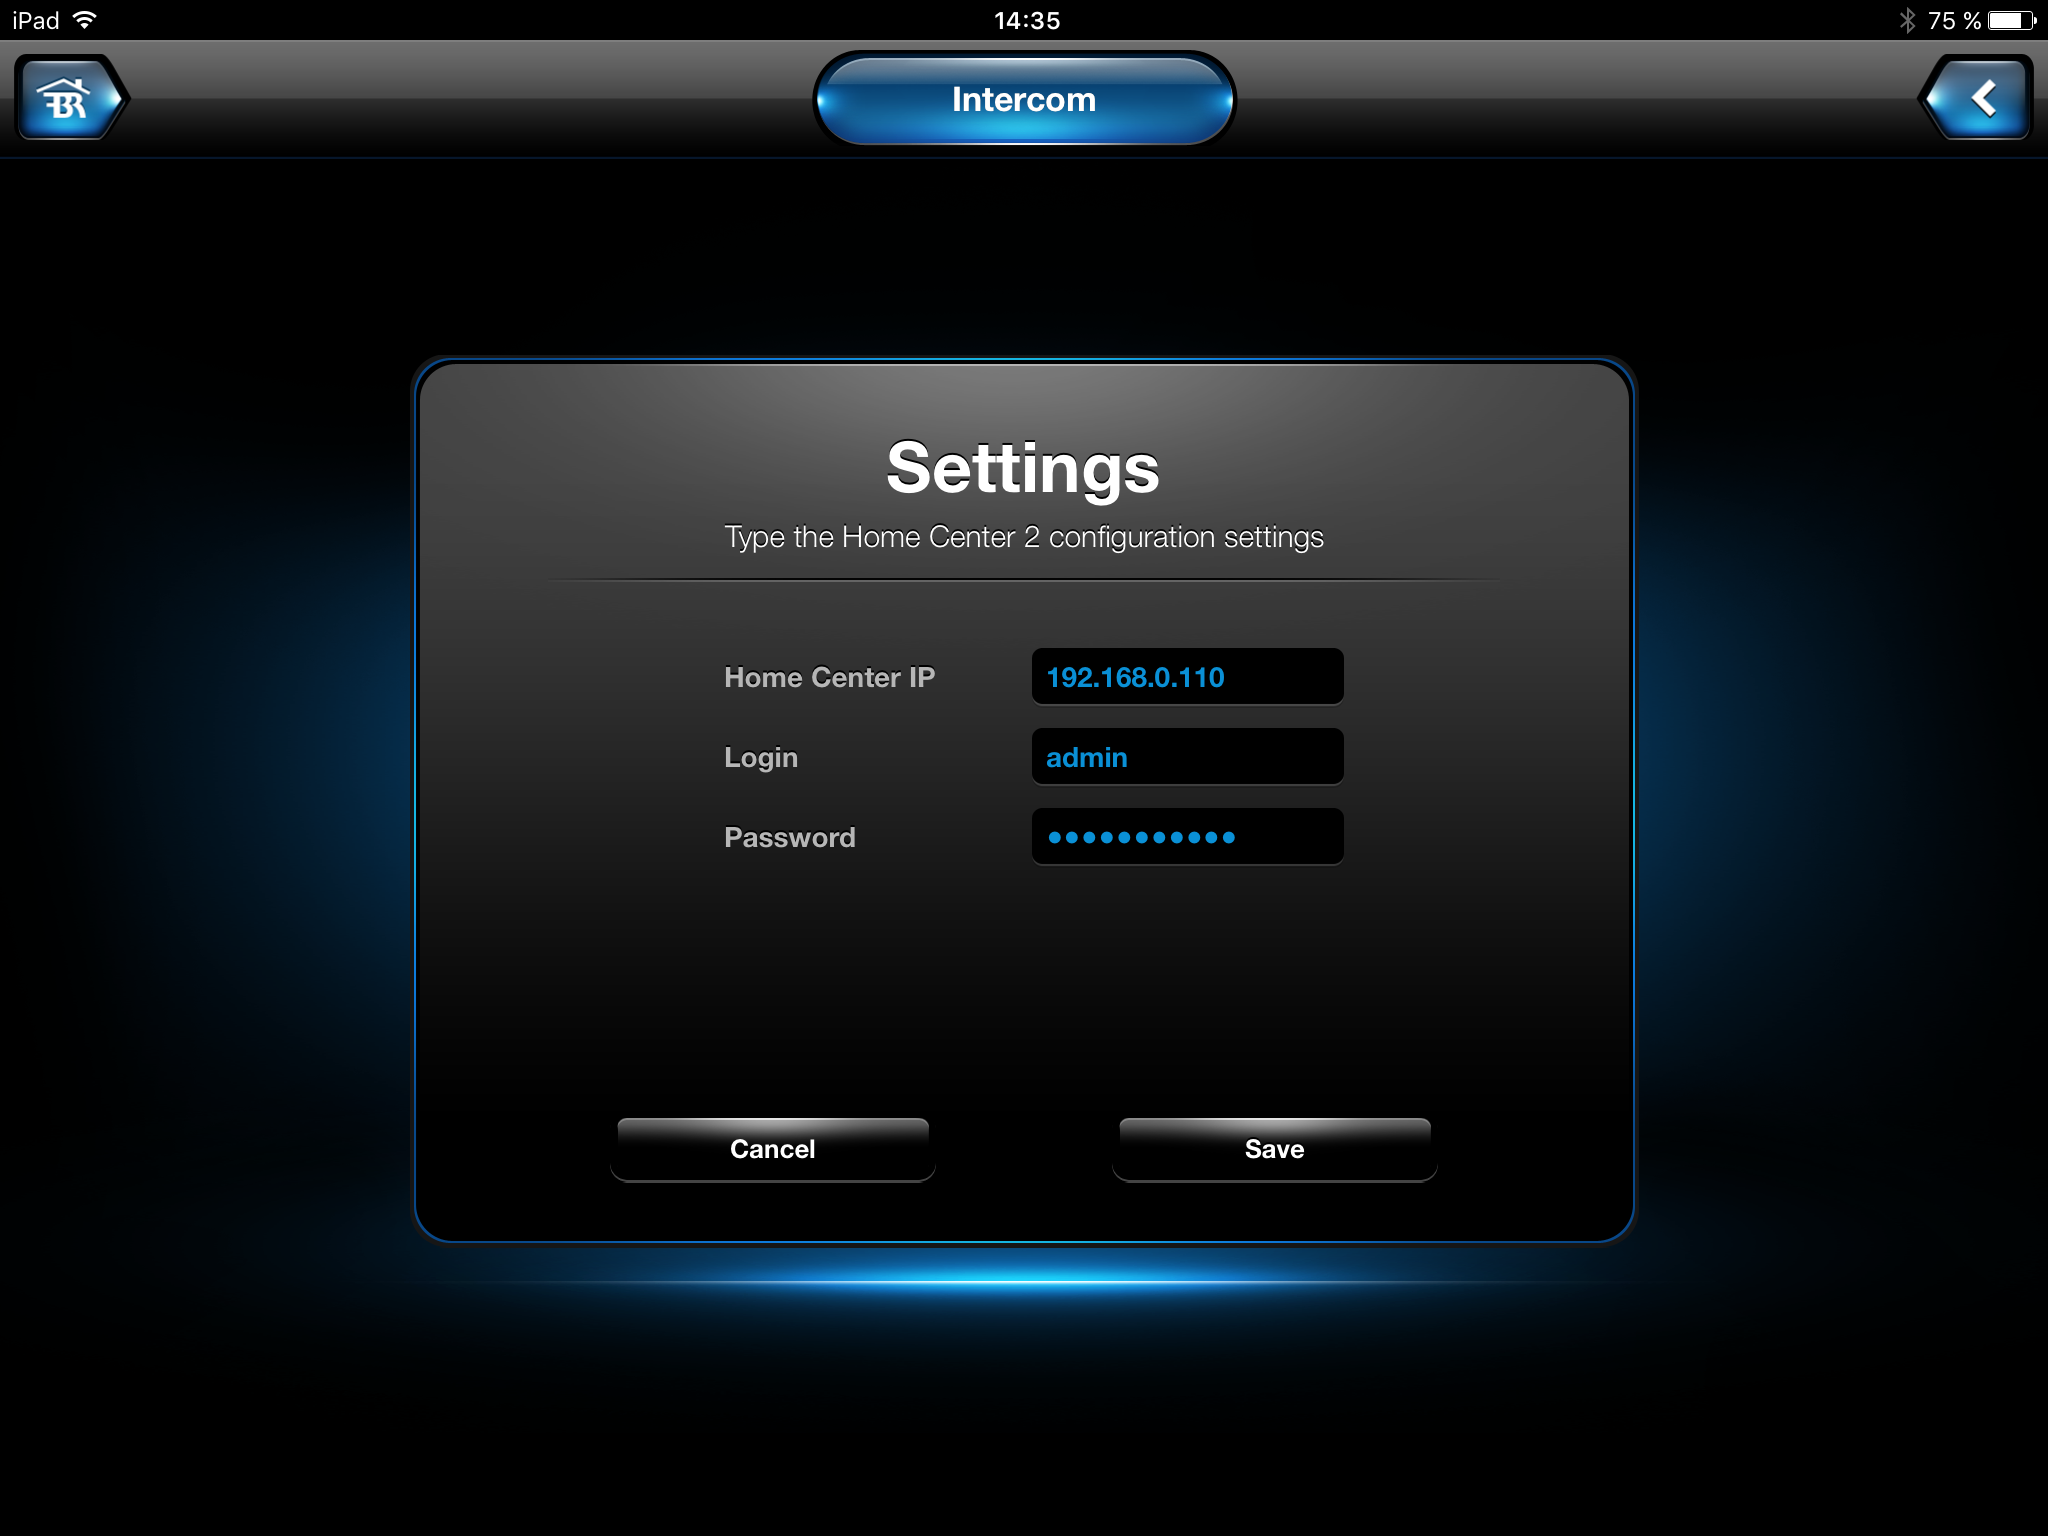
How to set VoIP in iPad with the Fibaro interface
- At the beginning you need to dowload the Fibaro Intercomm application into your iPhone/iPad. Link for iPad Link for iPhone
- For the devices with the Android system the Fibaro Intercomm application is not available yet, unfortunately.
These instructions are for iPad. After you have installed the application you must open it. Set the local access of the Fibaro control unit, also the IP address, user name and password.
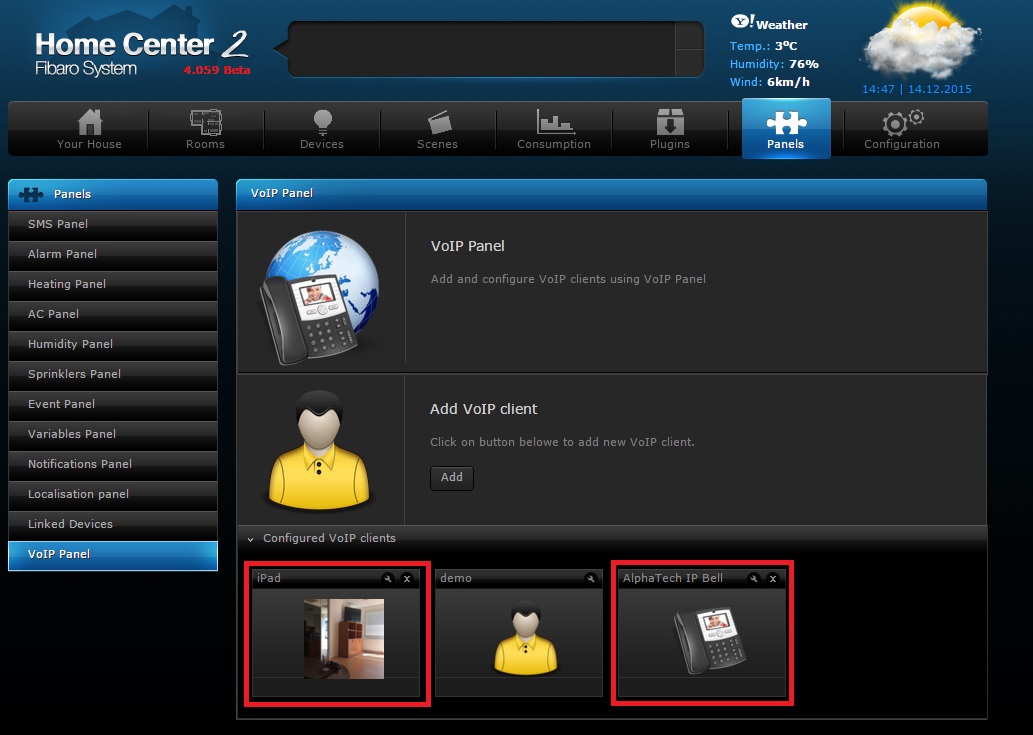
In the figure you can see 3 VoIP clients, the first iPad is defined using the Fibaro Intercom application, AlphaTech IP Bell is our used door-keeper. The Demo client is used as an example of the VoIP system from the Fibaro company.
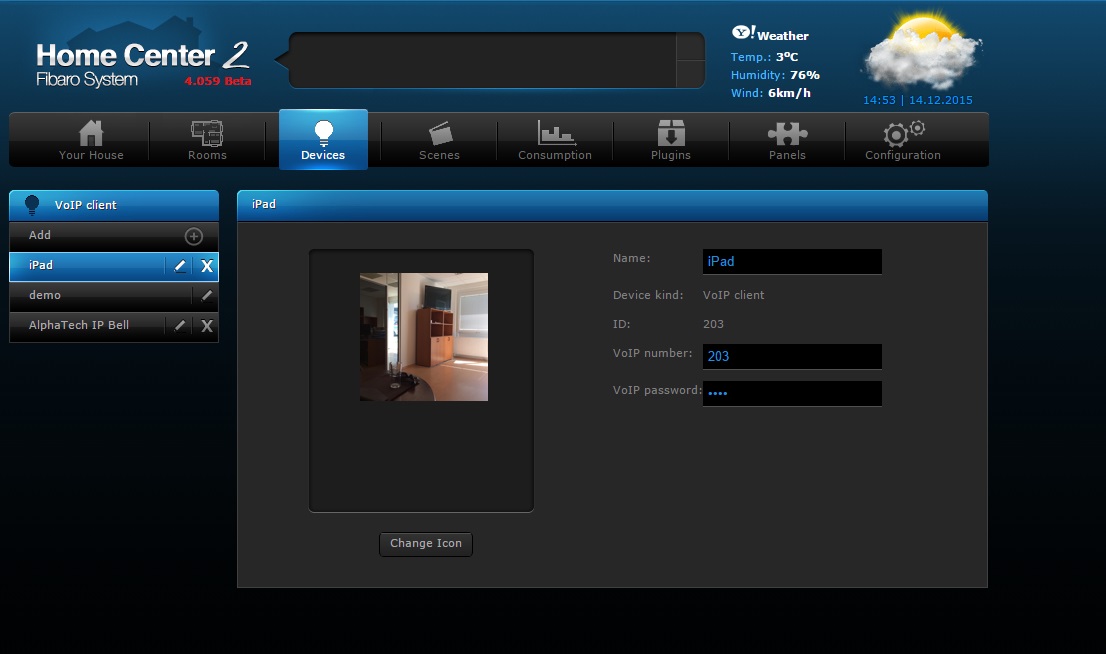
For us it is necessary to remember the VoIP number, in our case 203, and you can use any VoIP password.
Note: In the list of VoIP clients, the AlphaTech IP Bell device is displayed after the configuration of the particular plug-in - the instructions are below.
How to set the AlphaTech IP Bell device?
Possible options for the power supply of the device:
-
12 V DC direct-current power supply
-
12 V AC alternating-current power supply
-
Using an Ethernet cable and the technology PoE
The correct wirign diagrams and the complete instructions for the device can be found HERE.
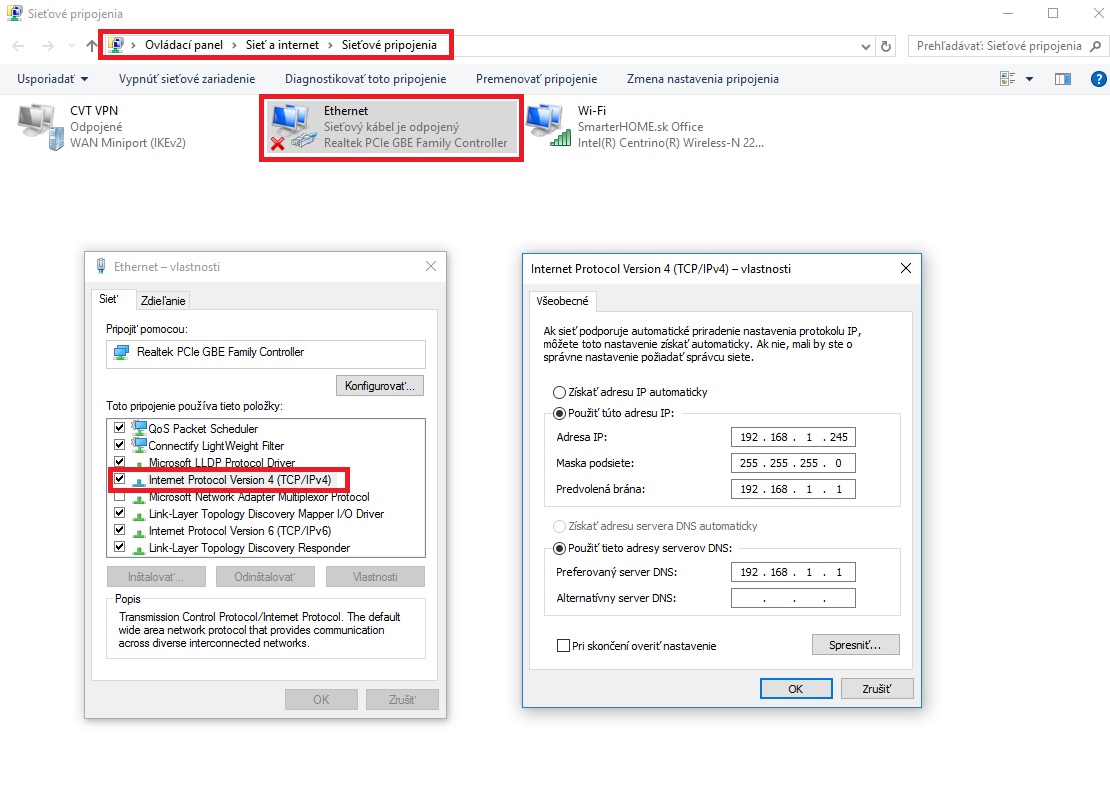
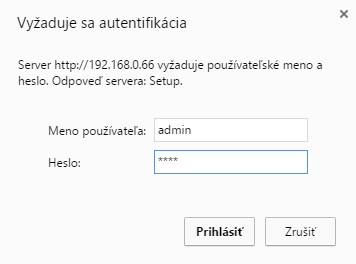
The first necessary step during the configuration of the door-keeper is the change of the IP address. The manufacturer set the IP address to 192.168.1.250. To get into the interface of the device you need to temporarily change the IP address in the properties of the TCP/IP protocol in your PC, e.g. to the address 192.168.1.245. It looks like this:
After this step you can enter the AlphaTech IP Bell interface, you must enter the IP address, it means 192.168.1.250 into the field for the address of the website in the web browser. The first page is displayed that shows the overview from the camera. See the figure below.

To change the settings of the device click Setup -> the interface asks for the access data. User name and Password are basically set in the IP Bell device -> Name: admin and Password: 1234.
Note: We recommend to change the password in the IP Bell settings.
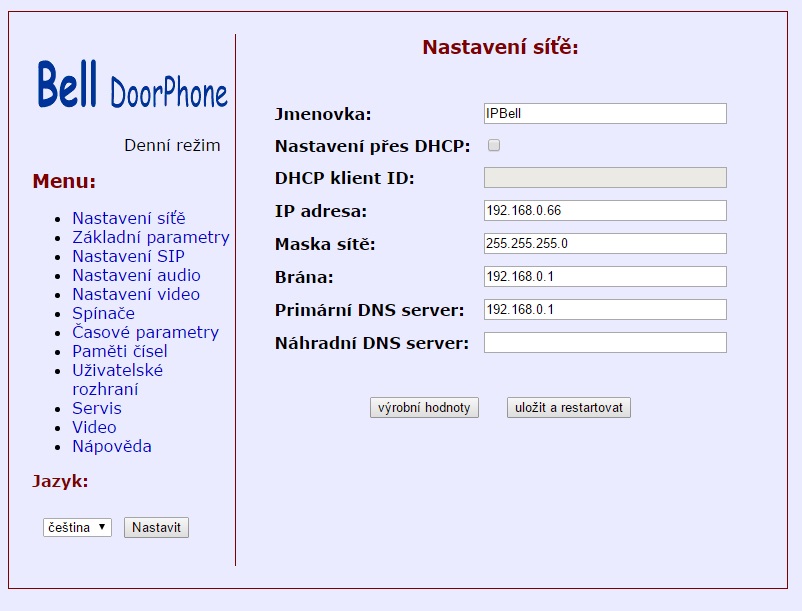
First, change the Network settings. Name the device, if you use DHCP you can have your IP address and the Network mask of the device filled in automatically. In our case the static IP address of the device is used.
Other important parameters include the SIP settings. To display the advanced settings it is necessary to turn switch 2 on the device into the position Off - lower position.
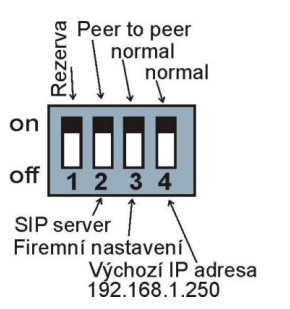
Note: The function of other switches is described in the manual of the device HERE.
SIP settings
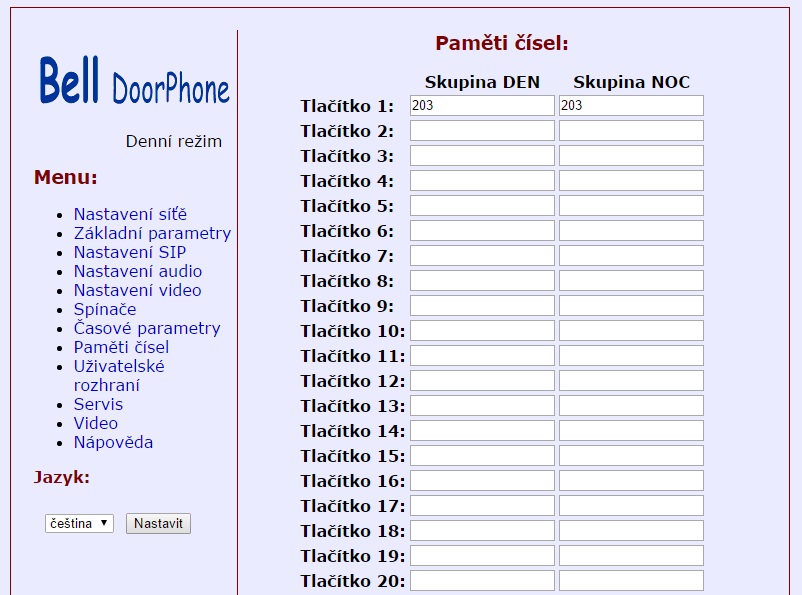
For the address of the SIP proxy server and the address of the SIP registration server you must use the IP address of the Fibaro Home Center 2 control unit, as seen in the figure. Use the code 5060 for the port of these servers. In the module settings use the VoIP number of the client, in our case with iPad it is 203 and the password selected at the beginning of the manual.
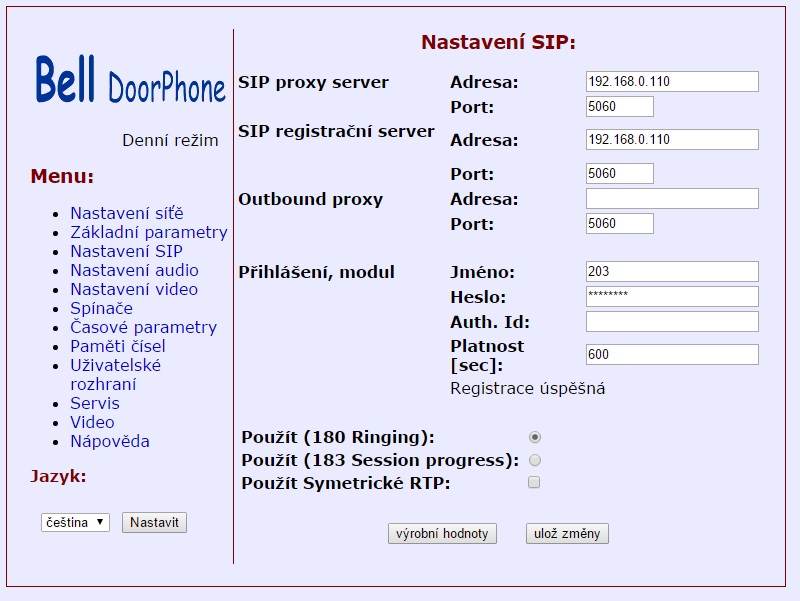
Then in the menu select the item Numbers memory where you must set again the number 203 of the VoIP client for iPad for button 1.
Note: The device contains a wide range of settings such as the quality of the audio and video, the settings of the switches etc.
How to set IP Bell in the Fibaro interface?
With the new version of the Fibaro system, version 4.059 BETA (zoznam zmien), the Fibaro company has brought a new plug-in with the name IP Bell for the control of all input security devices.
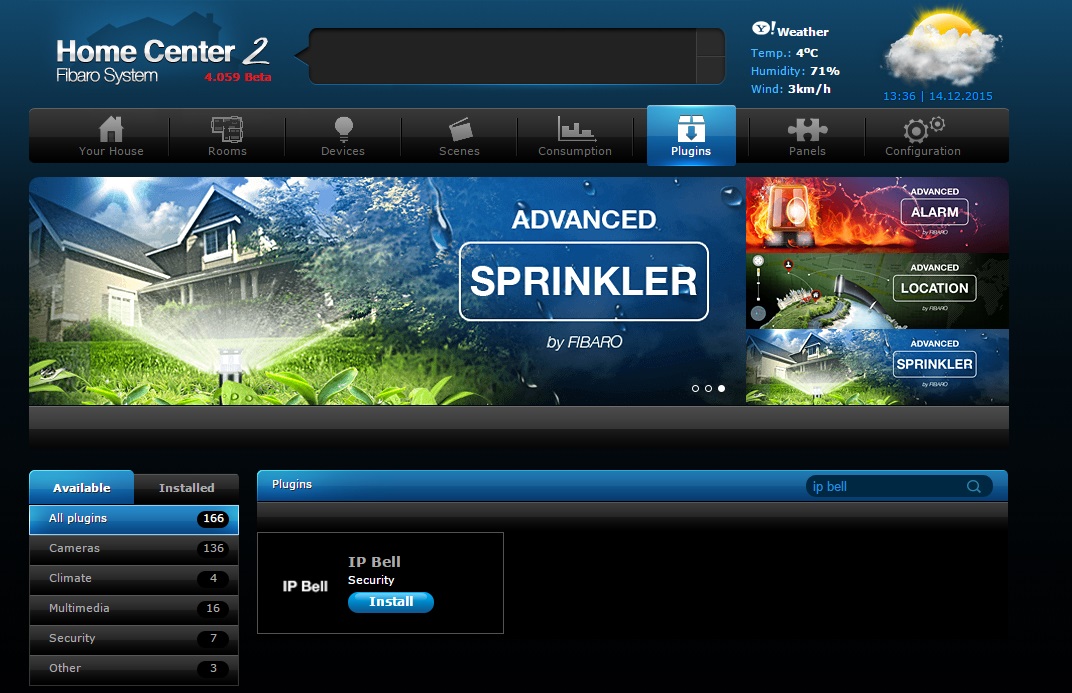
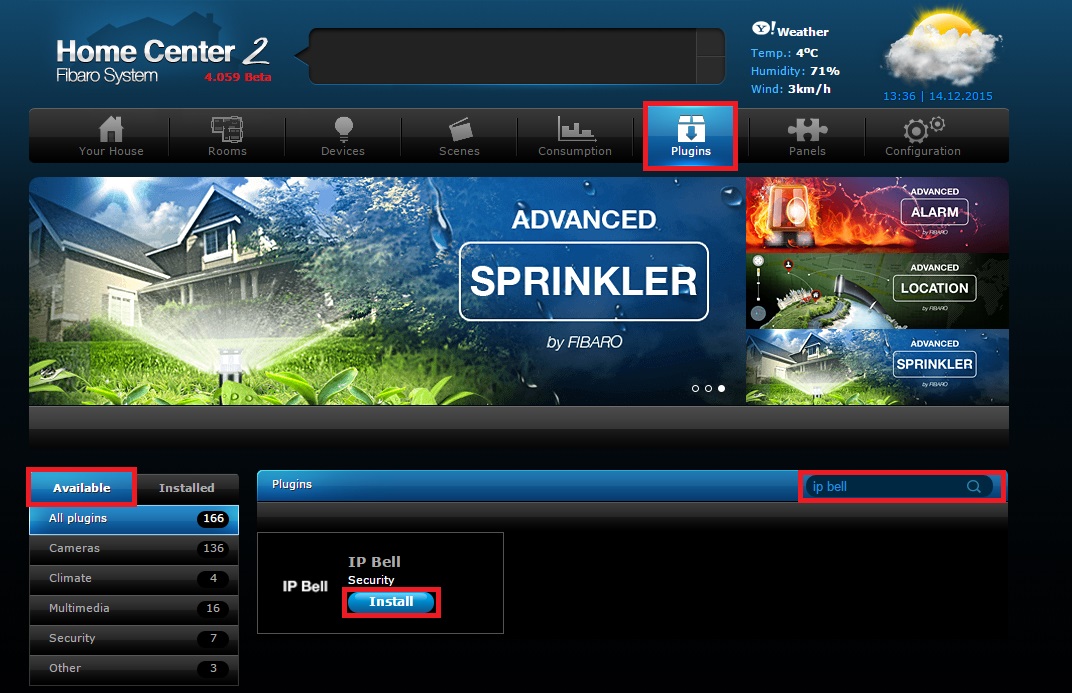
To be able to control the video broadcasting from the IP Bell device we need to install the IP Bell plug-in in the Fibaro interface. It is very simple. In the options for Plugins – select the option Available – write IP Bell into the browser adn click Install. See the figure below.
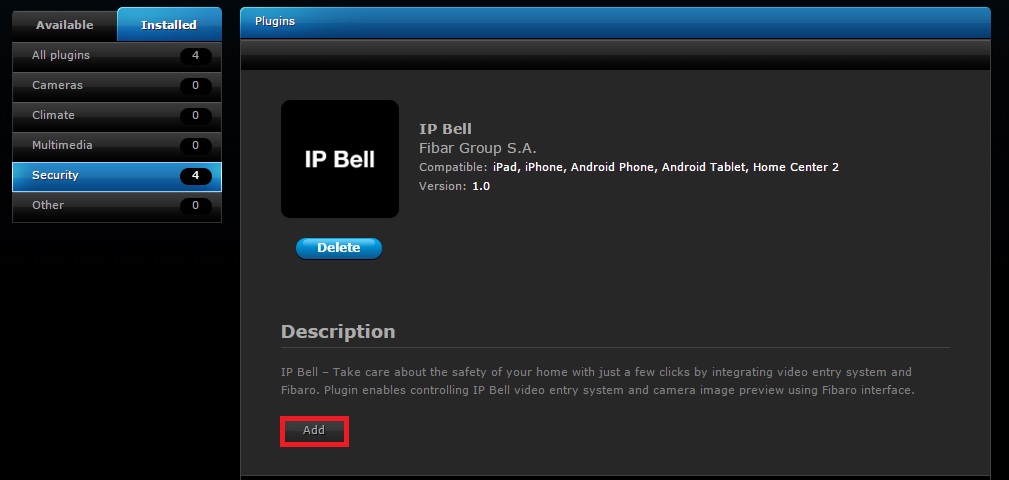
A short despription of the pluginu opens, then click Add.
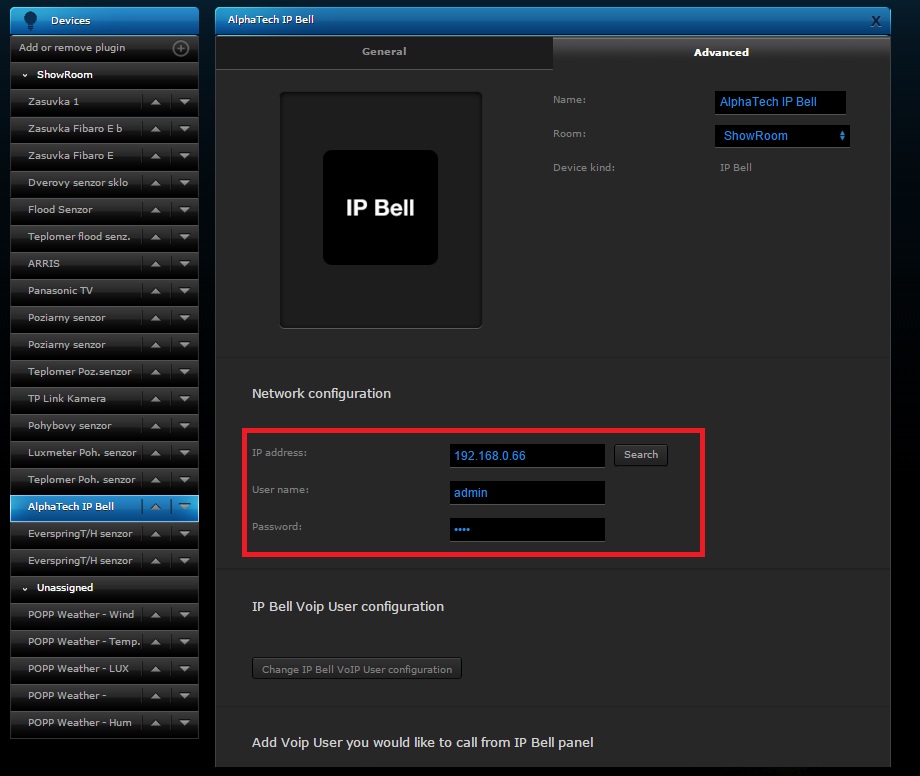
Then a window is opened where, in the general settings = General, you must define the Name and the Room.
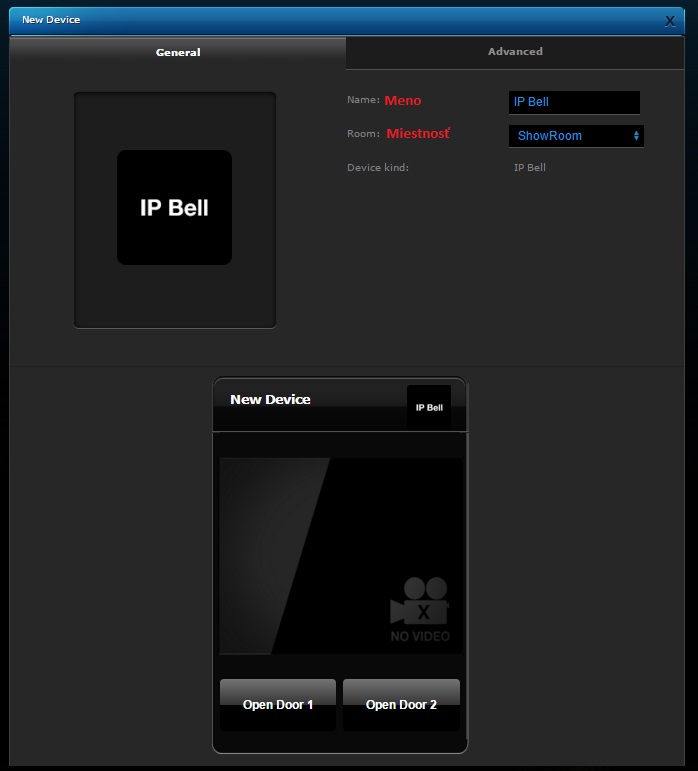
In the advanced settings = Advanced set the IP address, either by manual entering or using the Search button which finds the IP address assigned to the IP Bell devices in the used IP range. User name and Password are basically set in the IP Bell device -> User name : admin a Password : 1234.
Note: We recommend to change the password in the IP Bell settings.
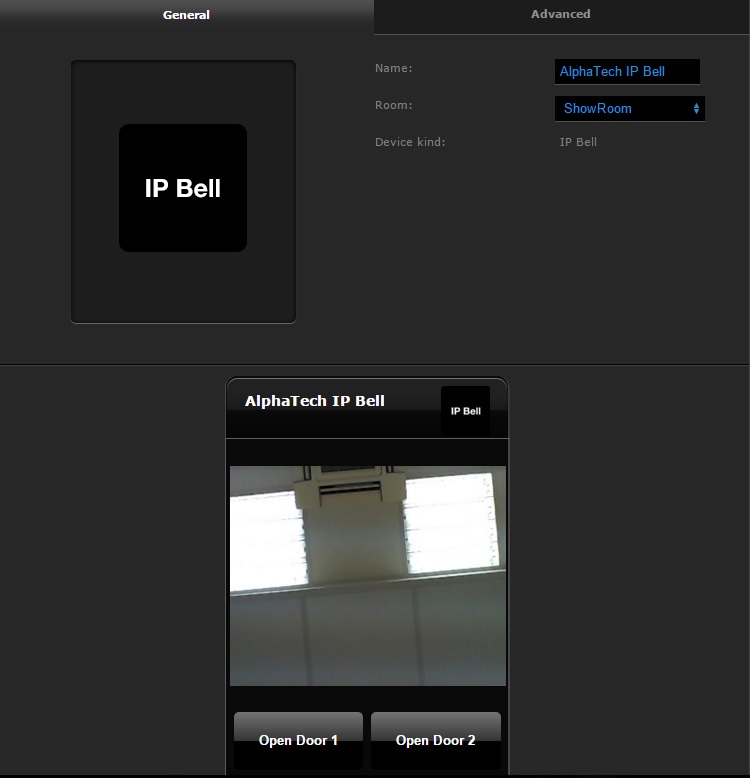
After these settings you should be able to see the video broadcasting and the opening of the door.
You can set the VoIP client whom you want to call after pushing button 1 or 2. See the figure below.

In our case we set that after pushing button 1 so you can call through VoIP to iPad.
In the following figures you can see the process of ringing after pushing button 1 and the subsequent video call using iPad.


Mi***** ** 16.12.2015
Vyborny navod ako prakticky pouzit Fibaro a "zvoncek", a ten šaššo je najlepšši :), dakujeme