LUA: Danfoss RS – Thermostat
LUA script for Fibaro HC2
Beacause winter is almost here we have prepared a simple LUA script for you that allows to utilize the full functinality of the Danfoss Z-Wave room sensor.
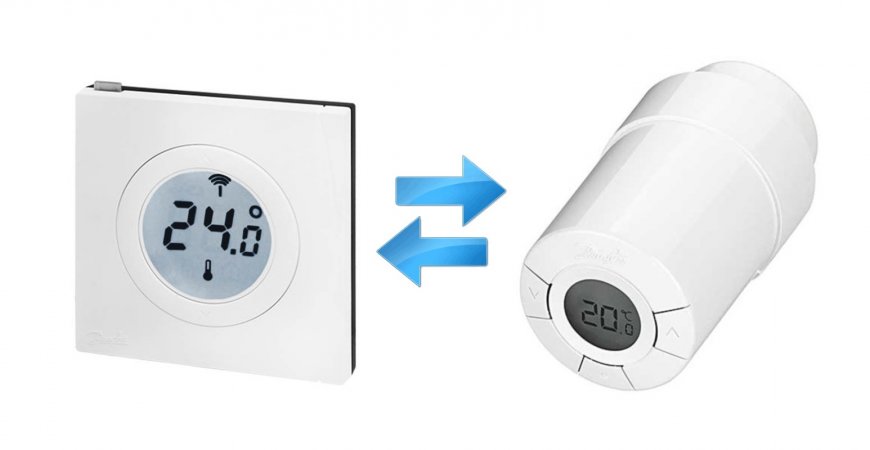
The Danfoss Z-Wave room sensor, besides measuring the temperature and reporting for the Z-Wave control unit, allows to manually set the temperature or to set the temperature using the Z-Wave control unit.
This scene allows to synchronize the temperature from the wall thermostat (Z-Wave room sensor) into one or more Z-Wave radiator stations.
LUA Script

In this script you must change the following:
Line 3 / Line 8 – ID of your Danfoss Z-Wave room sensor (thermostat)
Line 9 / Line 15 – ID of your Z-Wave thermostatic head, e.g. Danfoss Living Connect
--[[
%% properties
1400 value
%% events
%% globals
--]]

local fromID = 1400
local toID = 1397
local time = 120

fibaro:debug('Prebieha synchronizacia teplot.')
local temp_wish = fibaro:getValue(fromID, "value")
fibaro:call(toID, "setTargetLevel", temp_wish)
fibaro:call(1397, "setTime", tonumber(os.time()) + time*60)
fibaro:debug('Teplota ' ..temp_wish.. '°C nastavena.')
There are not many settings in this script. The most important point is the setting of the correct thermostat ID in line 3 of the script. This point starts the scene, detects if the the temperature in the thermostat has been changed either manually or using a controller.
Besides this, the local variables "fromID" and "toID" must include the respective ID. "FromID" is the ID of the device from which you can read out the temperature (thermostat), and "toID" is the ID of the device in which you must set the temperature.
It is also necessary to enter the time - how long the heating thermostat must keep the temperature. This is done by using the "time" variable. The pre-defined value is 120 minutes. But this variable may be changed if necessary.
After you have carried out all the settings the scene is called out by a change in the thermostat and then the changed temperature is set in the thermostatic head.
Related products
Leave a CommentLeave a Reply
Blog categories
Blog search
Latest Comments

SmarterHOME Team
on Shelly devices "Pending connection" issue (FIX)

SmarterHOME Team
on SHELLY HomeKit Support (Open Source)
Vlada
on SHELLY HomeKit Support (Open Source)

SmarterHOME Team
on Shelly devices "Pending connection" issue (FIX)

SmarterHOME Team
on FIBARO Home Center 3 Lite - questions and answers
MORAVEC group s.r.o.
on FIBARO Home Center 3 Lite - questions and answers
Martin Sušek
on Qubino Smart Meter
- SMART SOLUTIONS
- About Z-Wave
- Information
- Blog
- Forum
- Brands


- Write us
- B2b
- Trainings
- Contacts
- DISCOUNTS
- Z-Wave Controllers
- Sensors and detectors
- Electrical meters
- Heating and Climate
- Switches and Dimmers
- IP Cameras
- Door Locks
- Wall Plugs
- Window and Blinds Control
- Multimedia Control
- Starter Kits and Bundles
- APPLE HOMEKIT
- Danfoss Link
- WiFi / LAN
- Zigbee
- Other products
- Gadgety
- Refurbished
- DISCOUNTS
11 Comments
Petr 19.11.2021 Reply
Dobrý den, je na tento termostat možné nastavit teplotní zónu? Nebo je nutno nejprve přidat jako virtuální termostat? Co se v tomto případě vyplní do Switches (select heating devices)? Případně je možné místo tohoto termostatu použít jen teplotní čidlo nebo snímat teplotu z jedné z hlavic a synchronizovat na druhou? Jde mi principiálně o funkci prostorového termostatu ovládajícího více Danfoss hlavic. Děkuji. PSmarterHOME Team 22.11.2021 Reply
Dobrý deň,termostat je možné nastaviť na teplotnú zónu.
Nastavené teploty môžete synchronizovať medzi hlavicami, namerané teploty synchronizovať medzi hlavicami neviete.
Pekný deň.
SmarterHOME
Peter 29.09.2019 Reply
Použil som tento skrypt na MCO termostat a hlavice Danfos ale komunikacia nie je obojsmerna.Komunikacia prebehne až ked spustim scenu manualne.Mam hlavice Danfoss a ked som skušal to spravit cez panely tak hlavice nevie identifikovat.Cele zle.....Skušali sme to aj programovat cez LUA ale po niekolkych hodinach samovolne prestavy termost na usporny režim a kuri na 28 stupnov.SmarterHOME Team 04.10.2019 Reply
Dobrý deň,ďakujeme za dotaz.
Celý cieľ skript-u je zobrať nastavenú teplotu z termostatu a nastaviť ju na hlavici.
Najdôležitejším bodom je nastavenie správneho ID termostatu v 3. riadku skriptu. Tento bod spúšťa scénu, zisťuje či bola teplota na termostate zmenená buď manuálne alebo cez kontrolér.
Čo sa týka MCO Home termostatu - tam sa nam osvedčilo používať - dovolenkový režim.
Prajeme pekný deň.
Romans Selapugins 04.03.2019 Reply
Thank YouSmarterHOME Team!Roman S 20.02.2019 Reply
Hi! What do i have to du in same way just with Vera controller? Thanks!SmarterHOME Team 28.02.2019 Reply
Hello,thanks for asking.
Probably the code mentioned above will not work in Vera, but it can be inspiration.
Try check this out:
http://wiki.micasaverde.com/index.php/Luup_Scenes_Events
Have a nice day.
Roman 19.12.2018 Reply
AhojDa sa tento script pouzit i pre Fibaro HC Lite?
SmarterHOME Team 19.12.2018 Reply
Dobrý deň,ďakujeme za dotaz.
Nie tento skript je možné použiť len na Fibaro HC2, ktoré podporuje LUA jazyk.
Pekný deň.
Stefan 26.09.2018 Reply
Danfoss Z-Wave room sensorThank you for this useful LUA script. But I have a problem with it. I have not a Danfoss but a EUROTRONIC SPIRIT Z-WAVE PLUS heat controller. According to the description of this controller I have to set the parameter 8 to 128 to use a separate thermometer. For my case I use the thermometer of a Fibaro window sensor.
I think your script should run also with this EUROTRONIC controller. But what happens is that the script change the setting temperature of the controller. Means, I chose a set point of 23°C for my bathroom and the script change it to the temperature of the Fibaro thermostat.
Which ID I have to use for the controller? The controller ID or the ID of it's internal thermometer?
Can you help me please.
Best regards
Stefan
SmarterHOME Team 28.09.2018 Reply
Hello,this script is very easy to understand. The script is just watching every change of thermostat setpoint from which you want transfer this setpoint to another thermostat.
What you need is change IDs on 3. and 8. line (1400), and then 9. line (1397) in the script:
- ID on 3. and 8. line is the same like in variable with name fromID. This ID is ID of device (thermostat) from which you want to take/tranfer setpoint.
- ID on 9. line is the same like in variable with name toID. This ID is ID of device (thermostat) to which you want to put setpoint.
Have a nice day.